Recover Deleted Data Using LSN(Log Sequence Number)
If you ever have the misfortune of having data deleted from the production database, don’t get upset as there is a way you can recover most of the missing data with the aid of Transaction Logs and LSNs (Log Sequence Numbers). Here is a step by step solution on how to achieve this.
Even if you use SqlBak to backup everything unauthorized data deletion from your database is one of the worst nightmares in terms of database administration. If you know when your data was deleted then the challenge to recover the deleted data is not as difficult. But, if you do not know the date and time when the data was deleted, then we will have to find a different way of identifying the data.
How to recover deleted data in SQL Server
Here are the the steps we are going to use in recovering our data.
For testing and example purposes we will create a database and a table schema.
1 2 3 4 5 6 7 8 9 10 11 | |
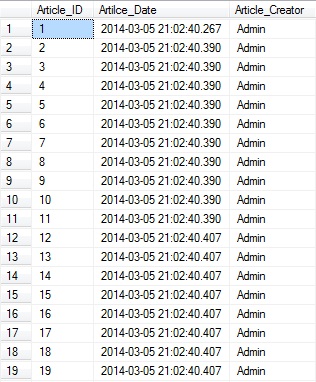
Populate the table with data using this script.
1 2 | |
Continue by deleting some records from the table in order to recover them through the help of LSNs in the SQL Server Transaction Log.
1 2 3 4 5 | |
You can see the results returned by the query above that the records are actually missing from the table.
Now, let’s go and review the Transaction Log of SQL Server to get the deleted records. Run the next query in order to get basic information about the deleted records.
1 2 3 4 5 6 7 8 | |
If you’ve gone along using all of the queries in this example, then after running the query above you should have the following result set returned.
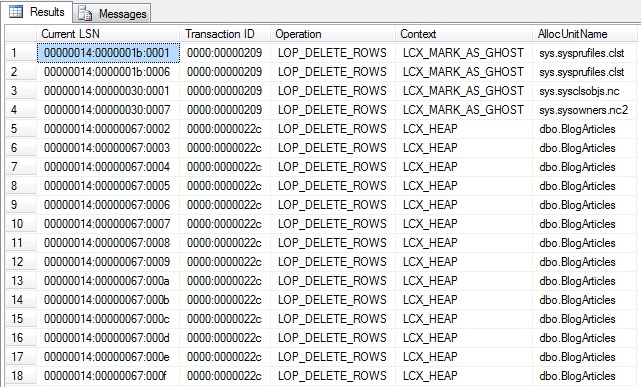
The Transaction ID column will show us what DELETE statement was ran, but in case you didn’t notice the AllocUnitName column stores the table from which the transactions have been deleted. You can additionally filter the results to display only those of this table with the query below.
1 2 3 4 5 6 7 8 9 | |
Other columns give us information about the table type, in this case it’s a HEAP type of table and the transaction that the DELETE statement was performed through transaction 0000:0000022c, and as we can see there are multiple records with the same transaction ID.
This type of information is quite important as it shows us that all of the records from the BlogArticles table were deleted with one transaction, which doesn’t necessarily mean one query.
In order to prove this run the next batch of queries
1 2 3 4 5 6 7 8 9 | |
If now if we are to go and run the query that displays data from fn_dblog, we will see that both queries have ran in the same transaction, thus proving that this is not sufficient evidence to identify the number of queries.
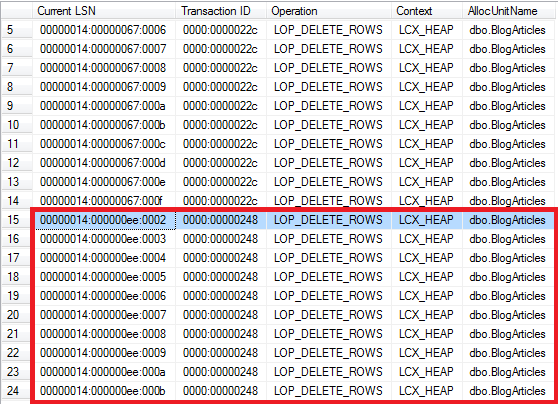
Now, we are going to take the transaction ID from the queries above. We will continue with the transaction ID returned by our second query, the one in the image above highlighted with blue, 0000:00000248.
Please be aware that from this point on you will have to use the LSN you have in your result set. We will continue this example with the LSN we were provided with by the query.
Using this transaction ID we will use it in the next statement to retrieve the LSN (Log Sequence Number) of the LOP_BEGIN_XACT operation. This means we will need the exact LSN when the DELETE query began its transaction.
1 2 3 4 5 6 7 8 9 10 | |
The above query should give you a similar output to the one in the image below.

Now we know the time the DELETE statement was executed, what is its LSN and what transaction it was executed under.
The next step involves changing the hexadecimal value of the LSN number into a decimal so we will be able to retrieve our data.
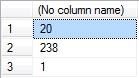
As you might see, our LSN number has 3 sections, each separated by a colon. We will use a query on each section of the LSN in order to get its decimal value.
Run the below query once for each part of the LSN and specify that part as a parameter to get the decimal number. In our LSN’s case the queries that we need to run are:
1 2 3 | |
Now that we have the decimal values of the sections of the LSN we will be using the STOPBEFOREMARK operation in order to recover our data.
We will use the decimal returned by the first query as it is, in this case it’s 20.
But the next decimals have to be preceded by leading zeros. The second decimal has to be preceded by zeros until it has a length of 10 characters, while the third should also be preceded by zeros until it has a length of 5.
Thus, the outputs that you are going to need in use are returned by the following queries
1 2 3 4 5 6 7 | |
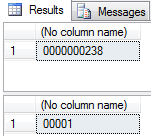
Now that we have the three decimal parts we can put the numbers together in order to get the LSN number. In our case, the LSN is 20000000023800001.
The next step is to run a Transaction Log Backup on the database from where data was deleted, if there was no previous transaction log backup done since the data was removed.
Now, we will do a restore of this database at a different location or on the same server with a different name up until the point of the LSN number we calculated above.
After that, we will import the missing data from the new restored database to the main database.
1 2 3 4 5 6 7 8 9 10 11 12 13 14 15 | |
At this point your restored database is ready and you can chech if the deleted data is recovered or not. Run the below SELECT to see the first rows which were deleted.
1 2 3 | |
You can see in the above screenshot that all rows were recovered. Now this data can be used. You can move the data from this database restore to your main database through SSIS‘s Import and Export feature.