Falcon CliNote — User Documentation
Falcon CliNote is an AI-powered clinical note-taking application for physicians. It converts voice dictation or uploaded audio into structured clinical notes, with support for EHR integration, e-signatures, and PDF export.
Table of Contents
- Getting Started
- Registration
- Login
- Forgot Password
- Security Setup (PIN & Biometrics)
- Navigation
- App Modes
- Patients
- Adding a Patient (Standalone)
- Editing & Deleting Patients
- EHR Patients (Falcon EHR Mode)
- Notes
- Creating a Note
- Recording a Dictation
- Uploading an Audio File
- Viewing a Note
- Note Actions
- Regenerating a Note
- Transcript (All Notes)
- E-Sign
- Setting Up Your E-Signature
- E-Signing a Note
- EHR Integration
- Connecting to EHR
- Syncing a Note to EHR
- Disconnecting from EHR
- PDF Export
- Note Templates
- Predefined Templates
- Custom Templates
- Custom Vocabulary
- Letterhead Management
- Settings
- Profile
- Password & App PIN
- Template Selection Toggle
- Admin Settings
- Troubleshooting & FAQ
Getting Started
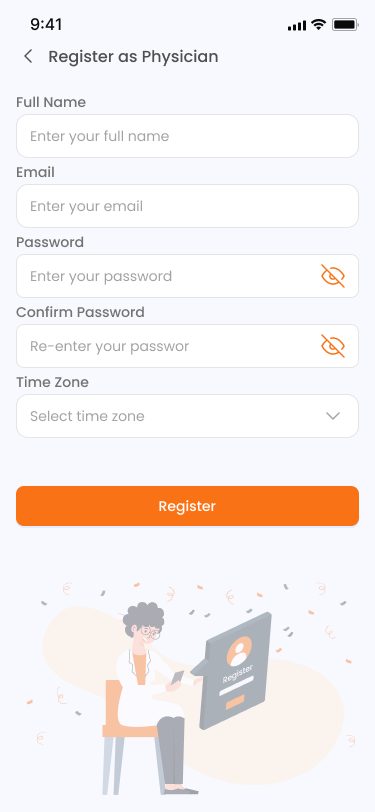
Registration
- On the login screen, tap Register.
- Fill in your details:
- Full Name — your display name within the app.
- Email — used for login and account recovery.
- Password and Confirm Password — must match.
- Time Zone — select your timezone from the searchable dropdown.
- Tap Register. A 6-digit verification code will be sent to your email.
- Enter the OTP code. You can tap Resend Code if it doesn't arrive.
- On success, you'll see a confirmation screen. Tap Back to Login to sign in.
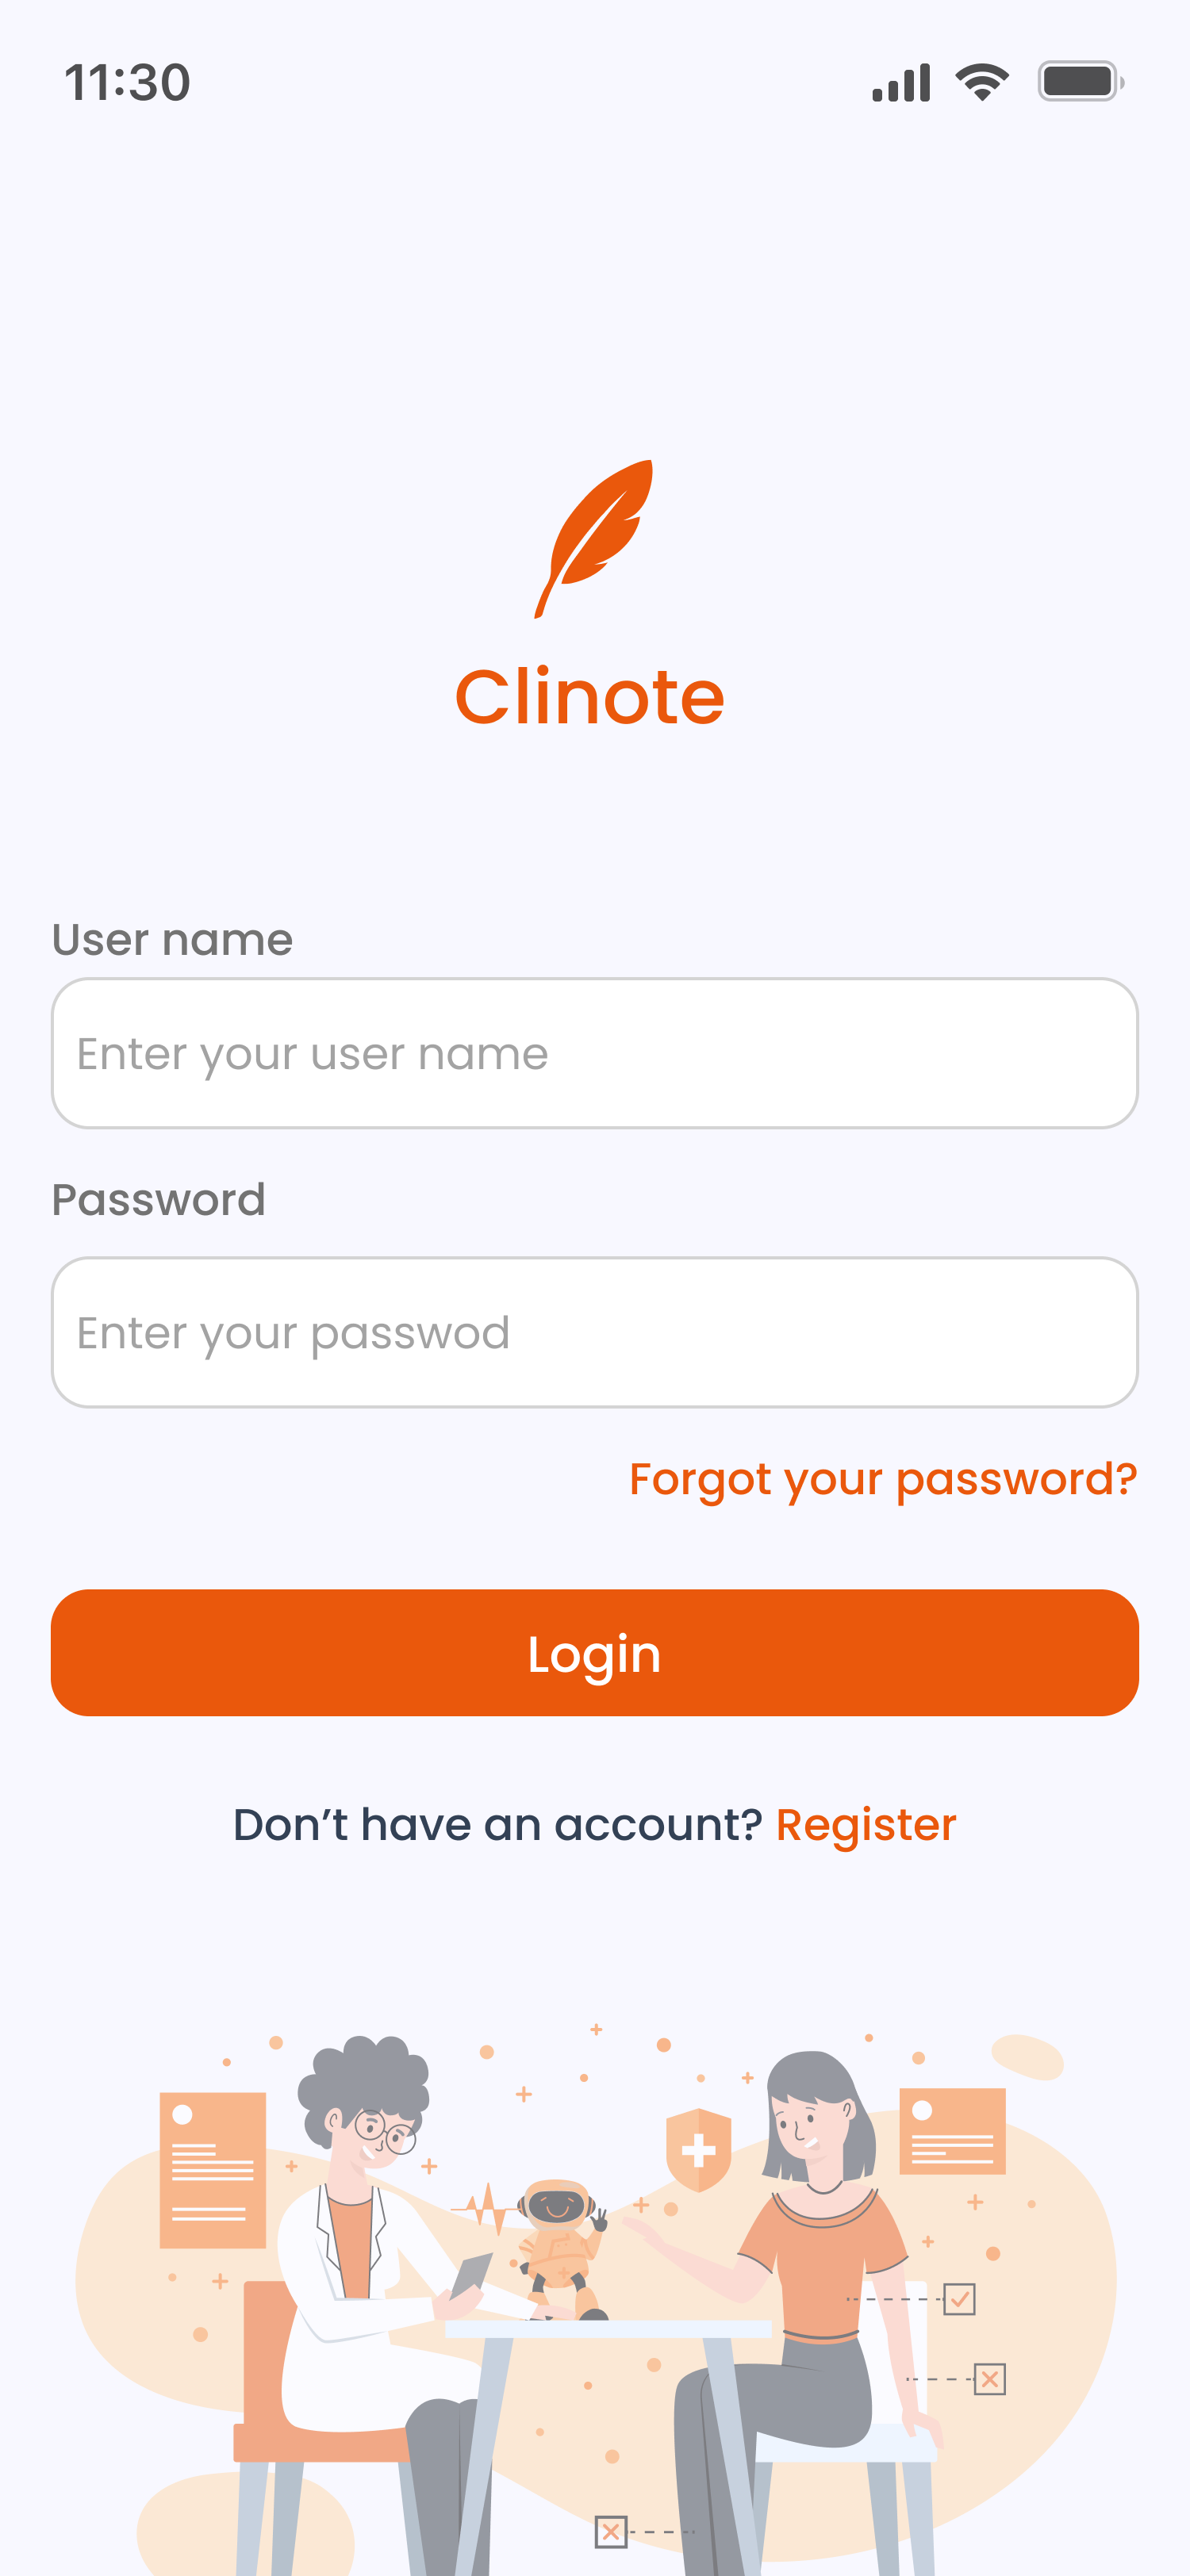
Login
- Enter your Email and Password.
- Tap the eye icon to show or hide your password.
- Tap Login.
- If this is your first login, you will be prompted to set up app security (PIN and/or biometrics).
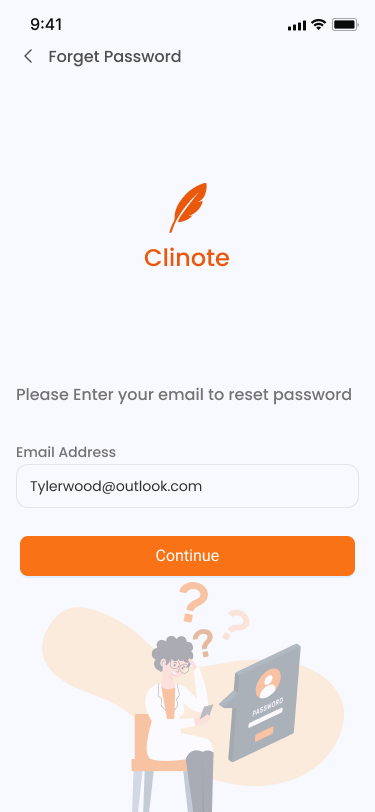
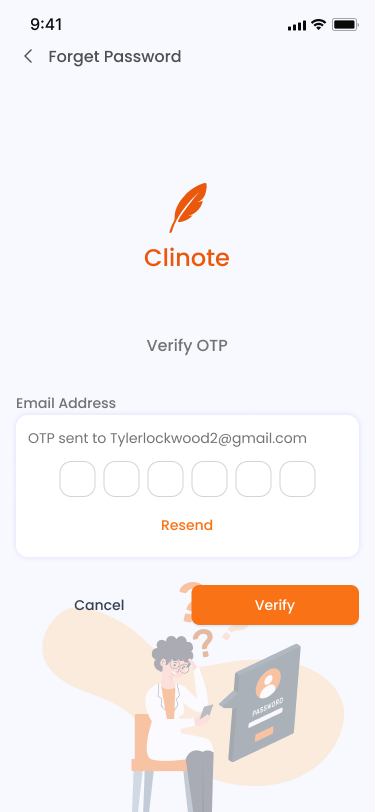
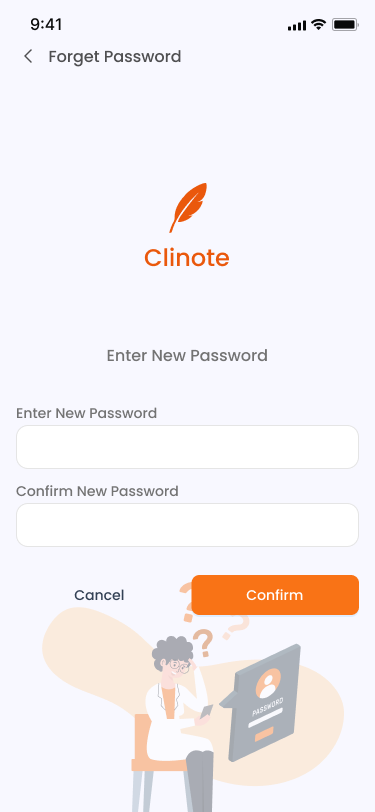
Forgot Password
- On the login screen, tap Forgot your password?
- Enter your registered email address and tap Continue.
- Enter the 6-digit OTP code sent to your email.
- Set your new password and confirm it, then tap Confirm.
- You will be redirected to the login screen.
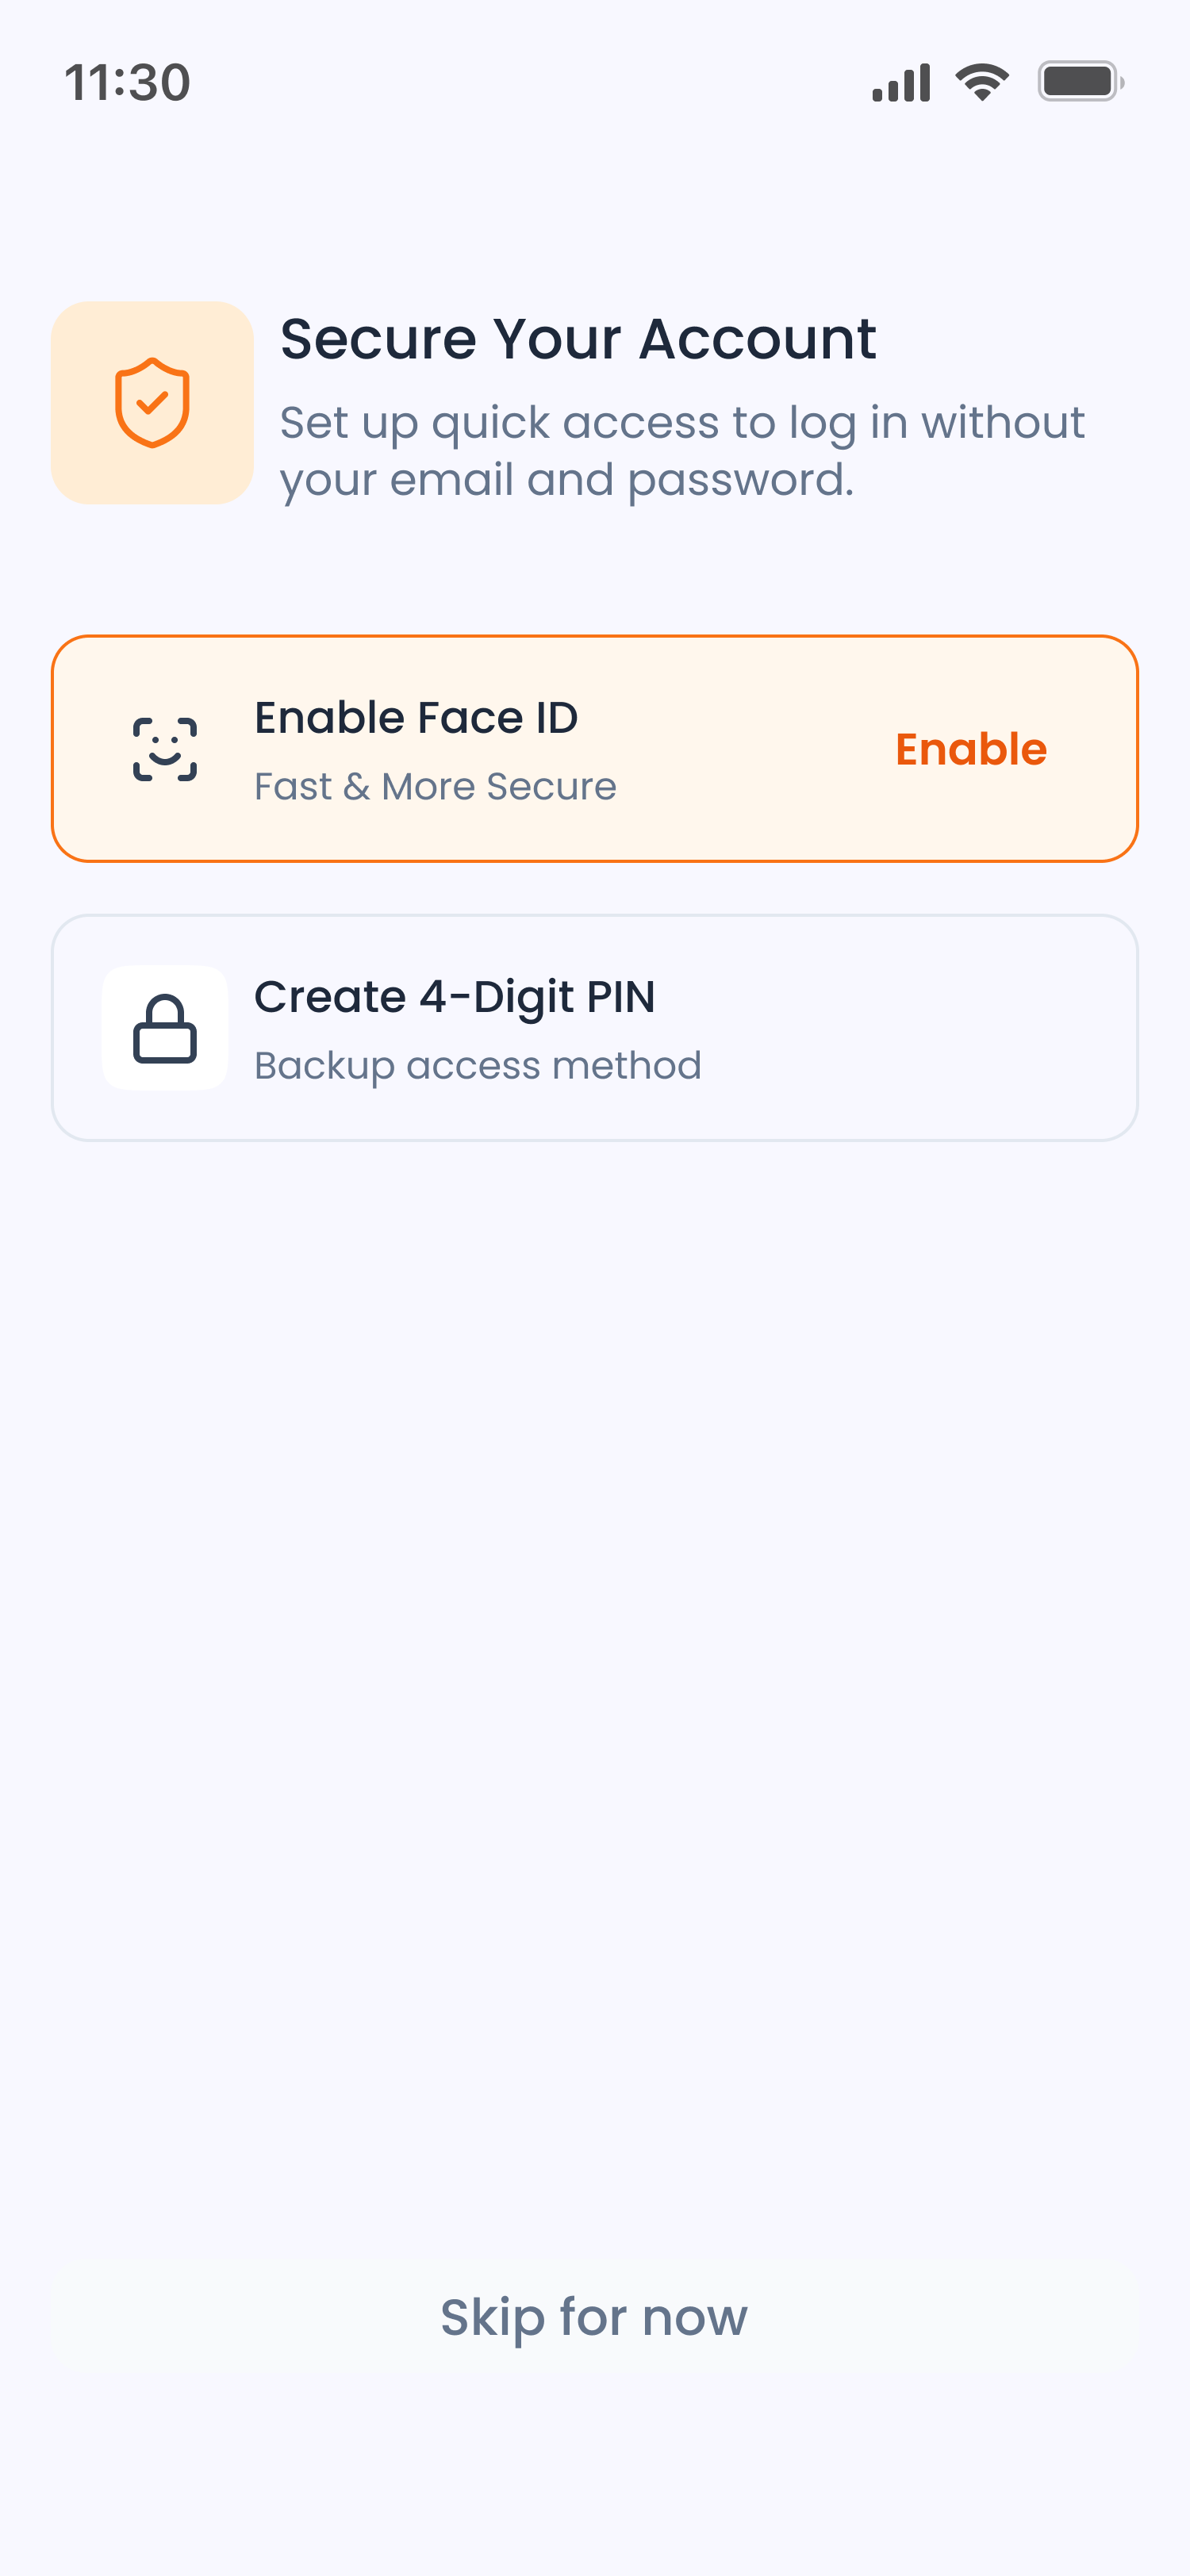
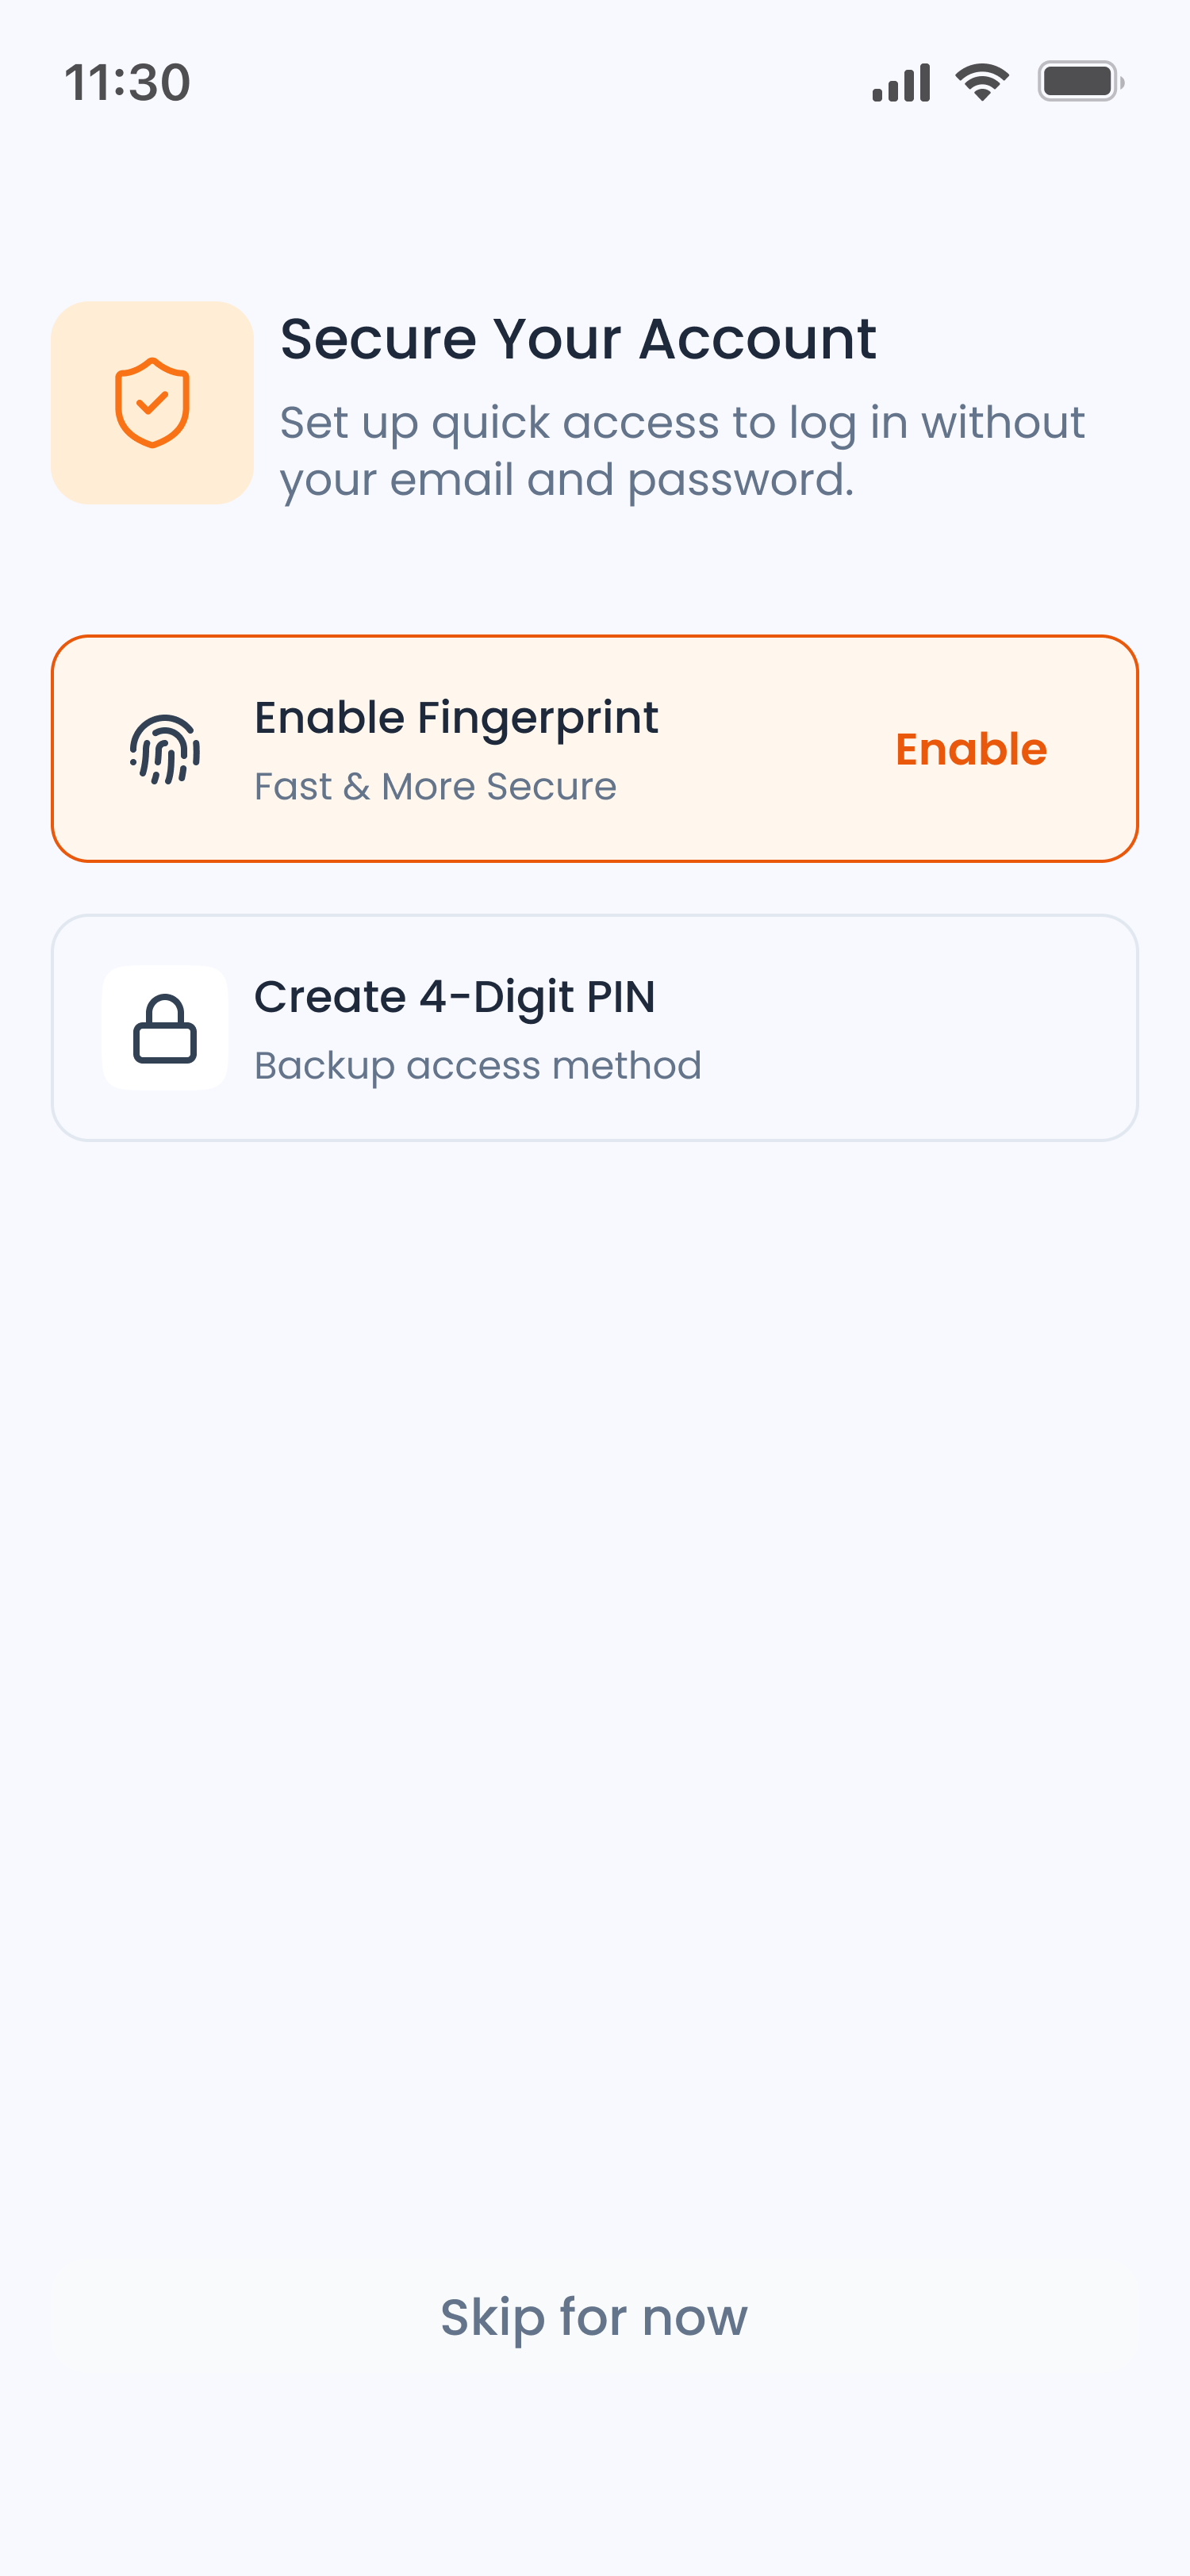
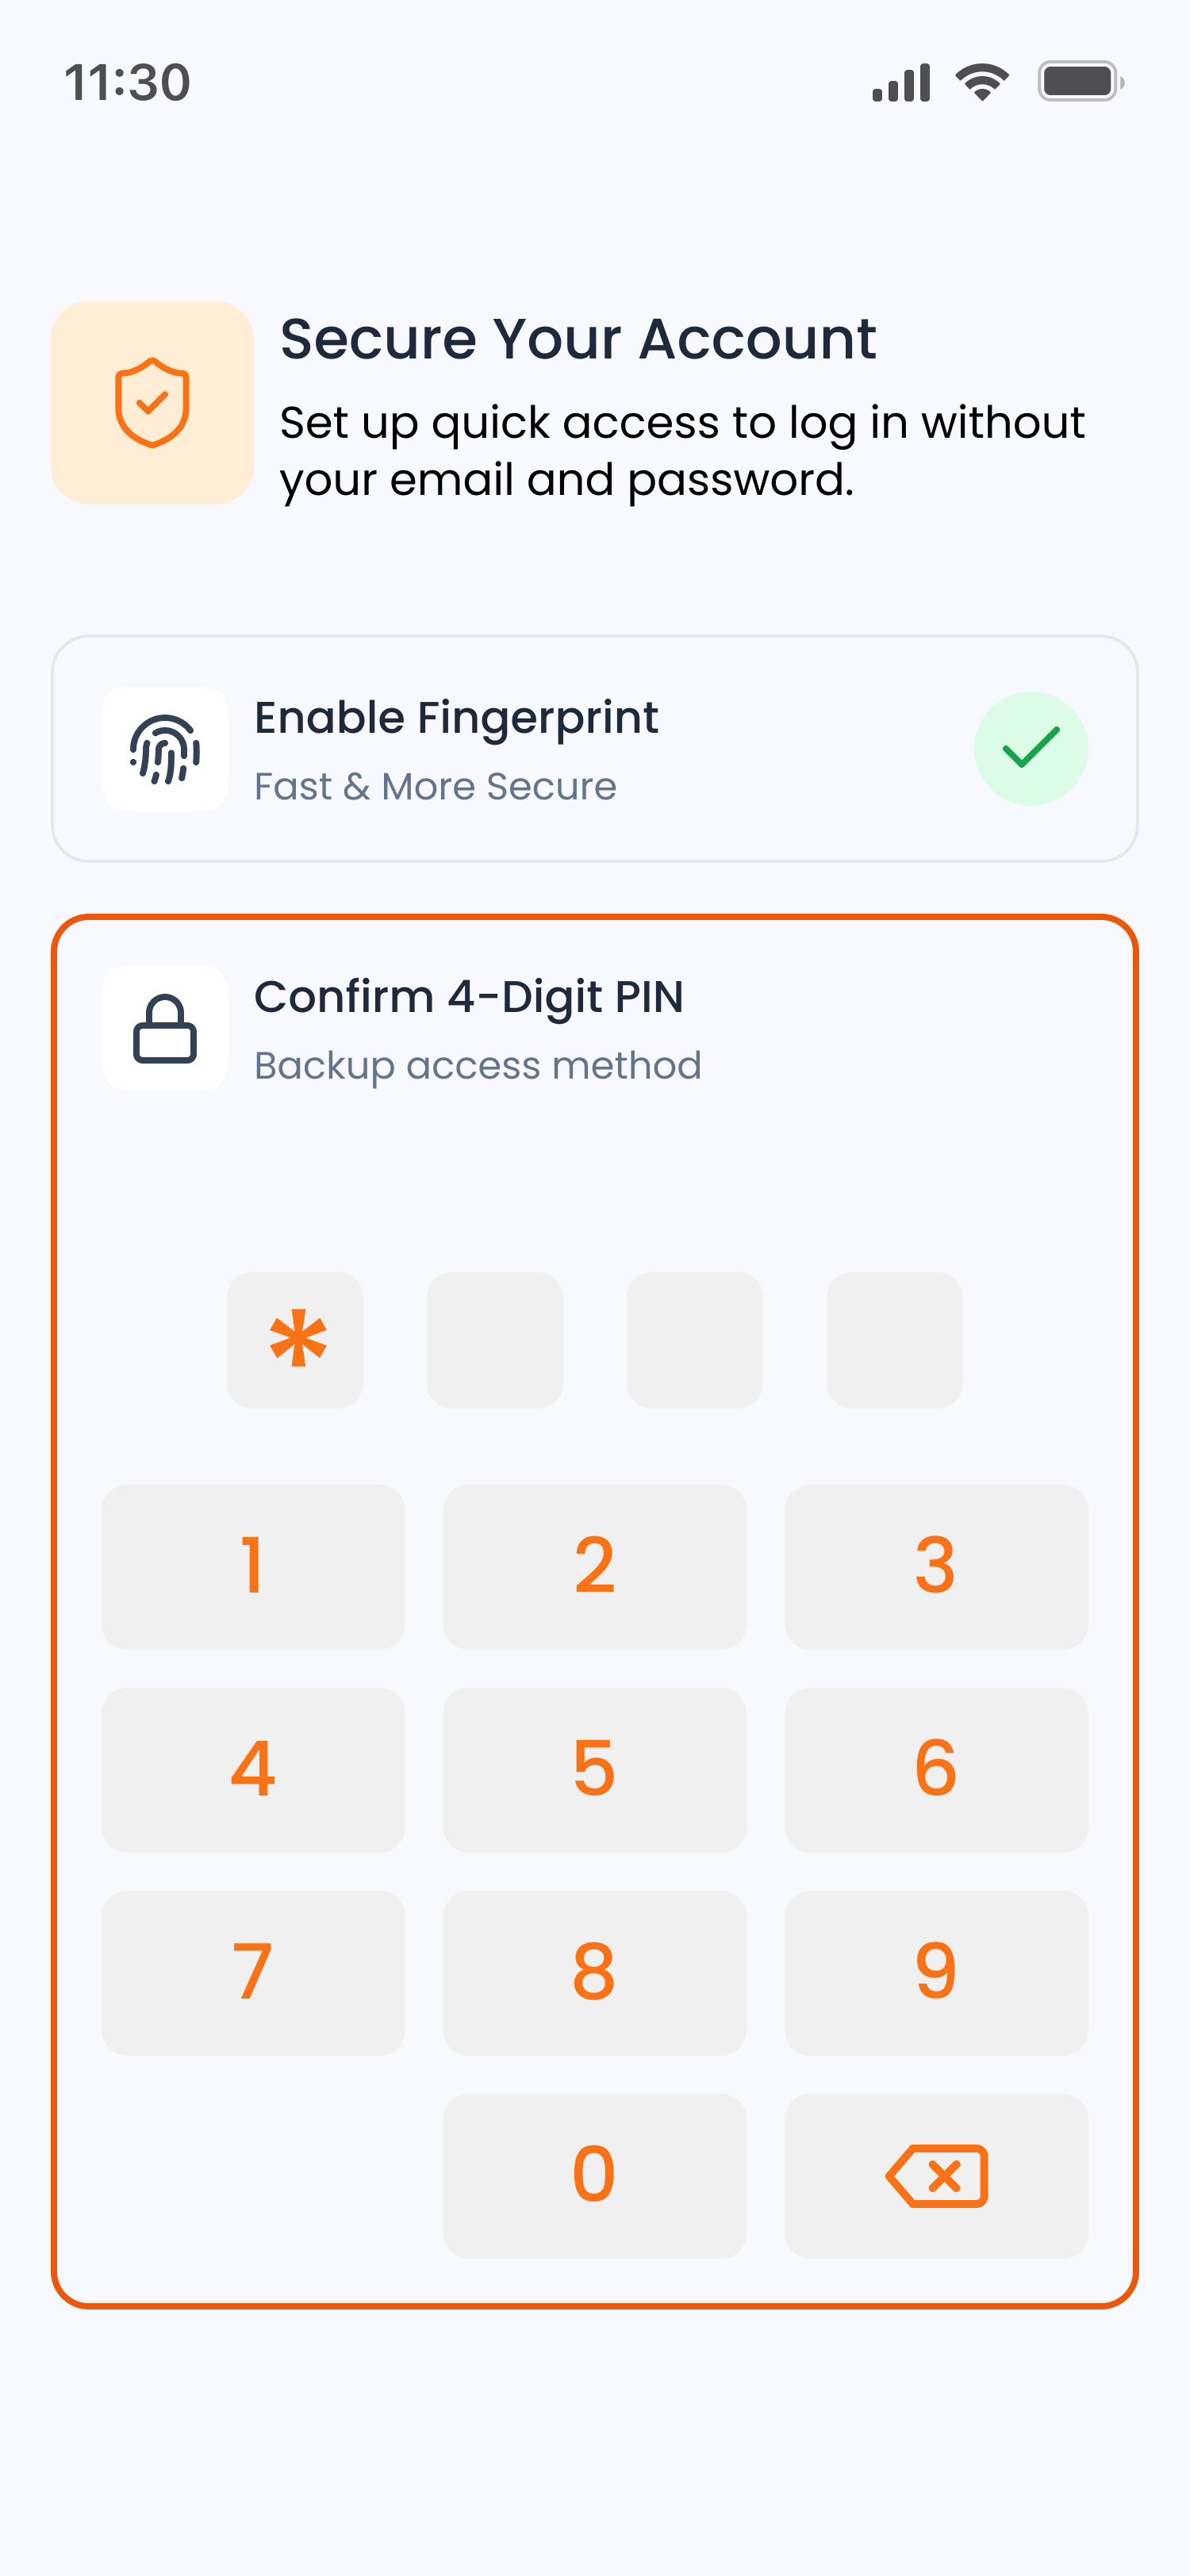
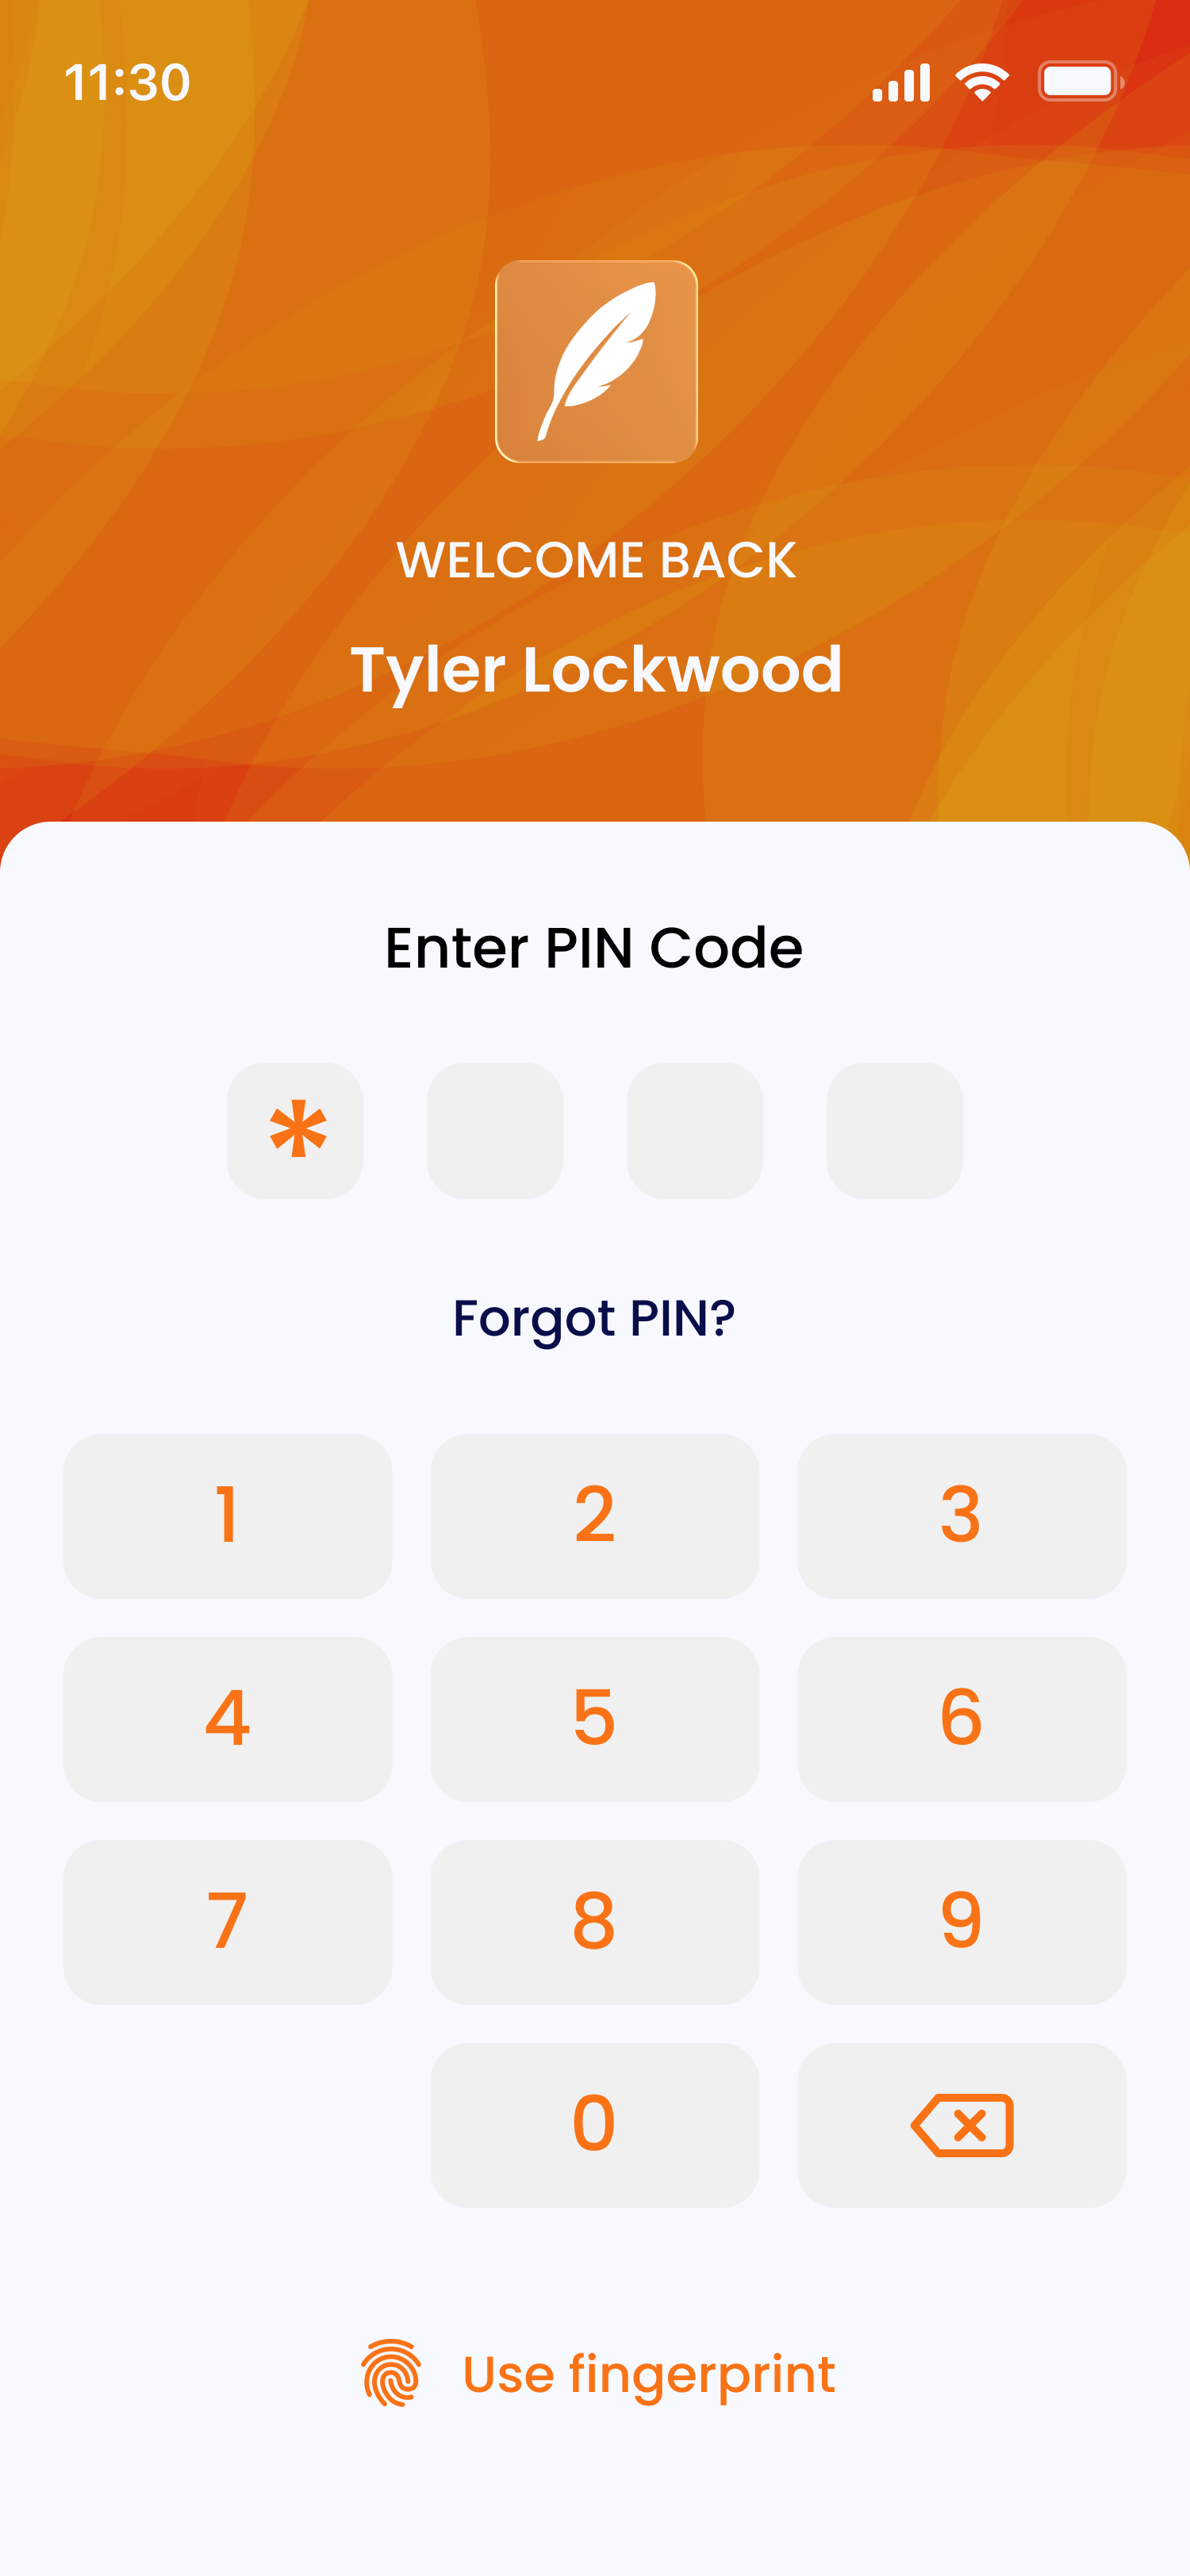
Security Setup
After your first login, the app will prompt you to set up security:
- Biometrics (Face ID / Fingerprint): If your device supports it, you can enable biometric authentication with a single tap.
- App PIN: Tap the PIN card to expand it, then enter and confirm a 4-digit PIN.
- Skip for now: You can skip setup and configure it later from Settings > Password. Once configured, the app will require your PIN or biometric verification each time you open it.
Navigation
The app uses a bottom navigation bar with three tabs:
| Tab | Description |
|---|---|
| Patients | View and manage your patient list |
| Transcript | View all notes across all patients |
| Settings | App settings, profile, and customization |
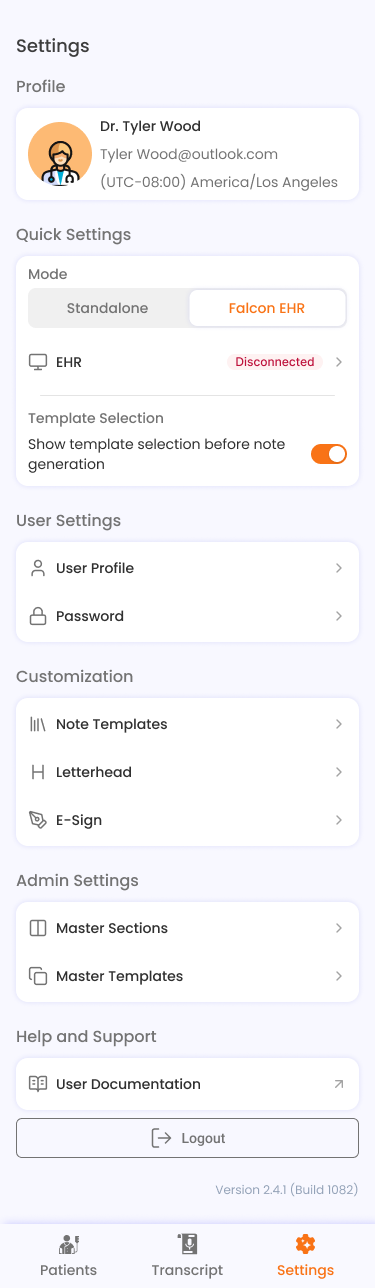
App Modes
Falcon CliNote supports two operating modes, switchable from the Quick Settings section in Settings:
| Mode | Description |
|---|---|
| Standalone (Clinote) | Manage patients locally. E-Sign and PDF download are available. |
| Falcon EHR | Patients are pulled from a connected EHR system. Sync to EHR is available. |
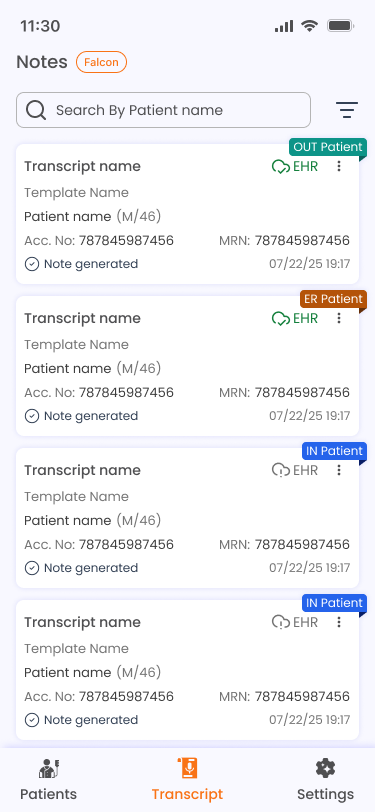
A mode badge ("Clinote" or "Falcon") appears in the header of the Patients and Transcript screens to indicate the active mode.
Note
For initial access, the user must be connected to the CRMC network, either directly or via VPN, to work in Falcon EHR mode. Once connected and authenticated, continued VPN or CRMC network access is not required until the session token expires. The token validity can extend up to six months.

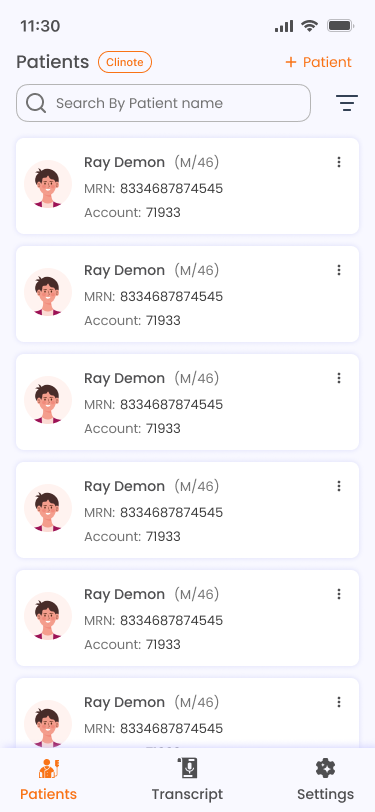
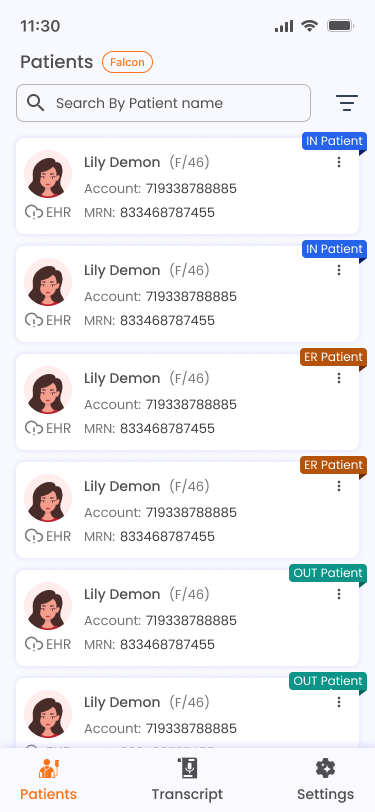
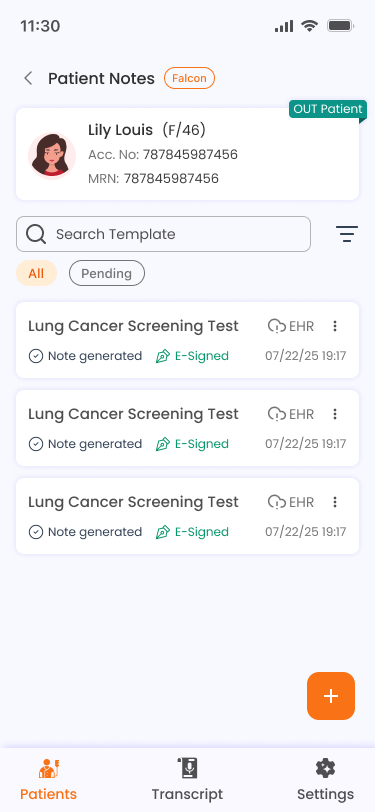
Patients
The Patients tab displays the list of patients you've added, with search and filter capabilities. Tap any patient to view their notes.


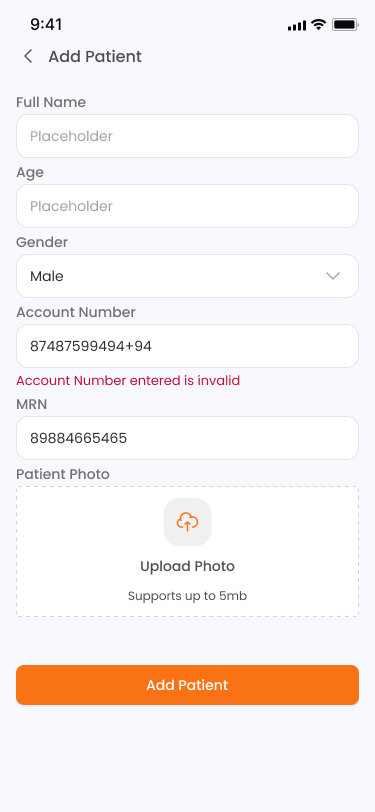
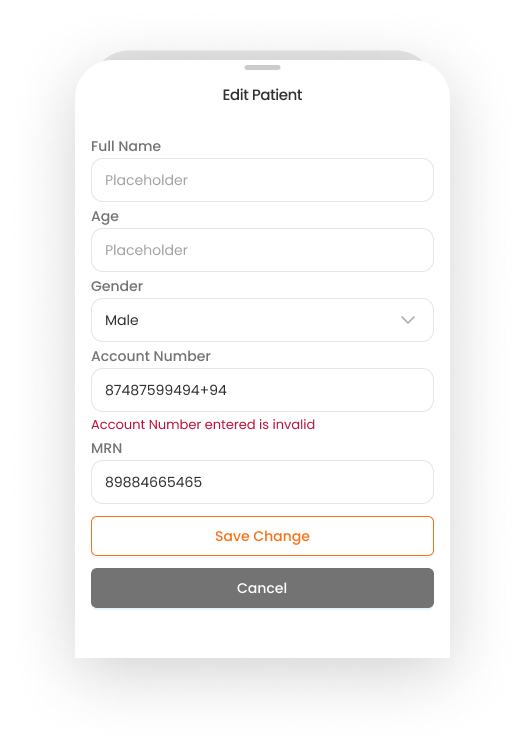
Adding a Patient (Standalone)
In Standalone mode, tap the Add Patient button in the header. Fill in:
- Full Name (required)
- Age
- Gender (dropdown)
- Account Number
- MRN (Medical Record Number)
Tap Add to save.
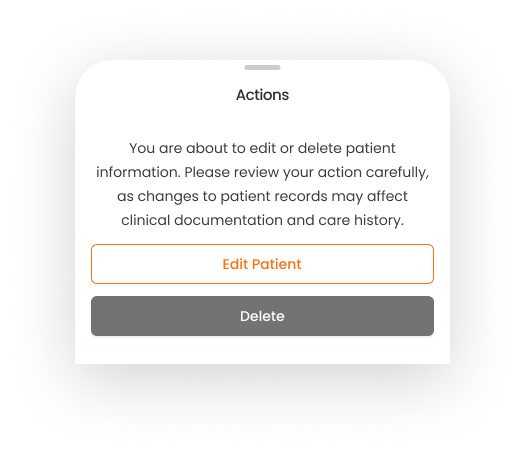
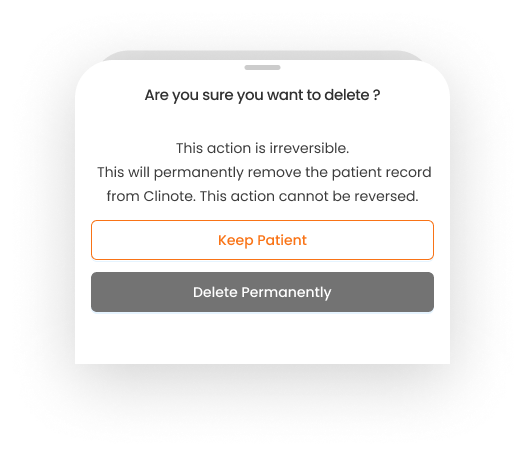
Editing & Deleting Patients
- Tap the three-dot menu (...) on a patient card to access Edit or Delete.
- Deleting a patient will prompt a confirmation dialog.
EHR Patients (Falcon EHR Mode)
In Falcon EHR mode:
- The app automatically syncs patients from your connected EHR system.
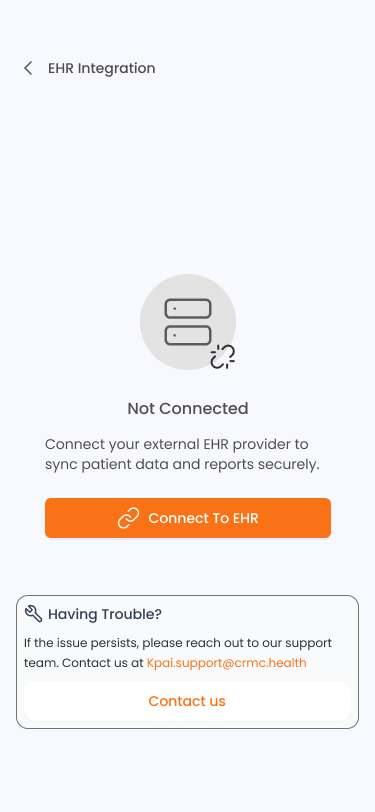
- If EHR is not connected, the screen displays an EHR Not Connected state with a Connect To EHR button.
Note
For initial access, the user must be connected to the CRMC network, either directly or via VPN, to work in Falcon EHR mode. Once connected and authenticated, continued VPN or CRMC network access is not required until the session token expires. The token validity can extend up to six months.
- Patient cards may show color-coded type tags (e.g., ER, IP, OP).
- Tapping an EHR patient automatically syncs them in the local system before opening their notes.
Notes
Each patient has a dedicated notes list. Access it by tapping a patient from the Patients tab.
Creating a Note
- Tap the floating action button (FAB) on the notes screen.
-
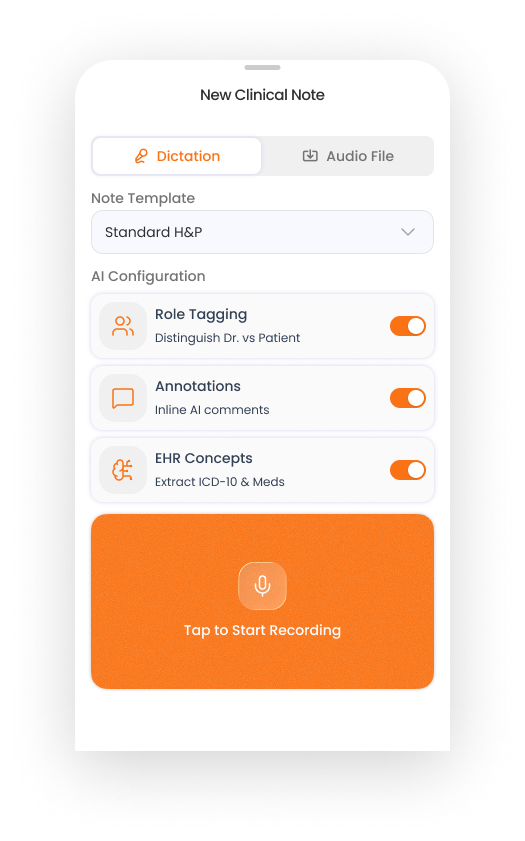
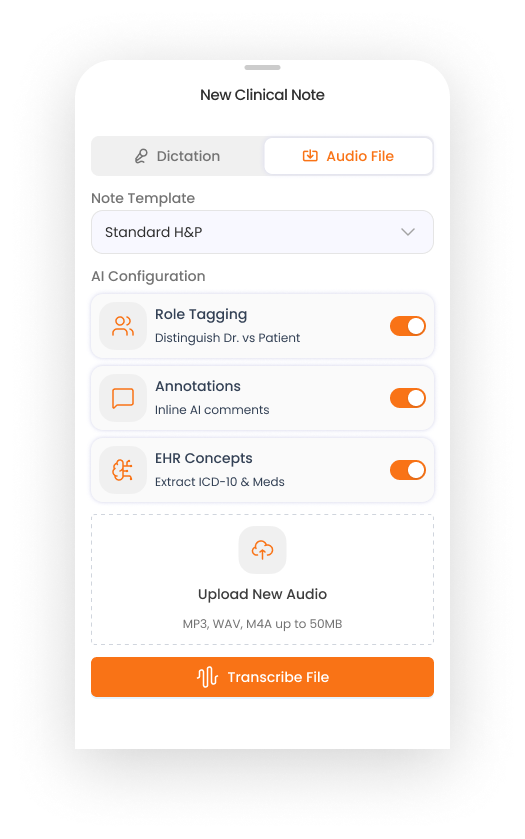
The Create Note sheet appears with the following options:
-
Input Mode: Toggle between Dictation (record live audio) or Audio File (upload a recording).
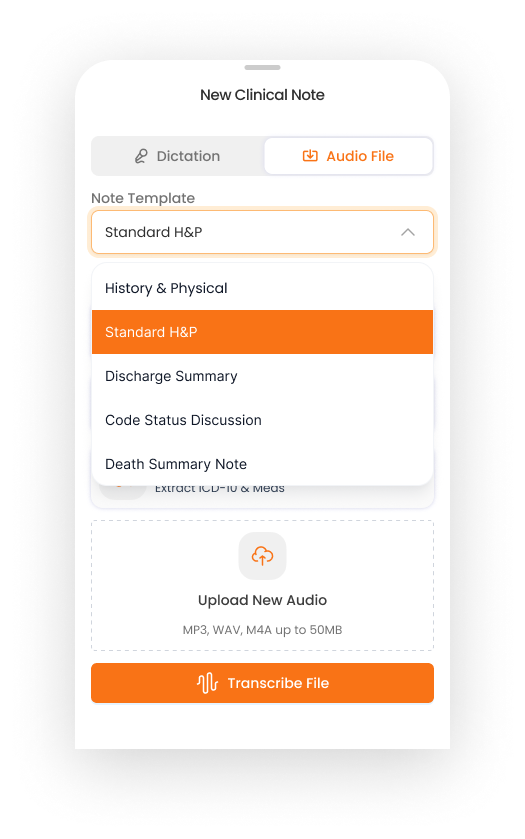
- Note Template (if Template Selection is enabled in Settings): Choose a template from the searchable dropdown. Templates are marked as "Default" or "Custom".
-
AI Configuration (collapsible section):
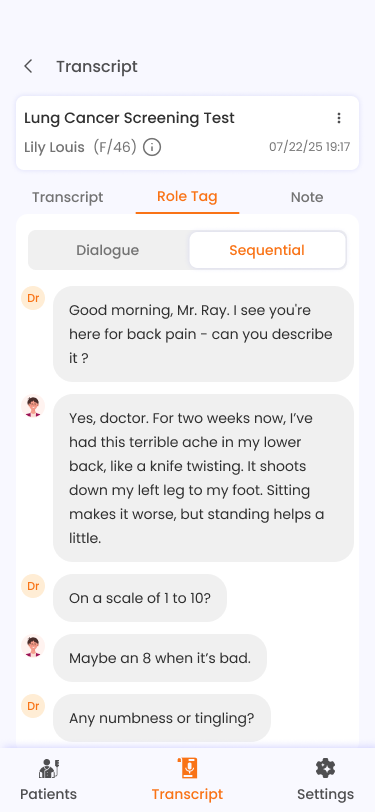
- Role Tagging — distinguishes between doctor and patient voices in the transcript.
- Annotations — adds inline AI comments to the note.
-
Proceed based on your chosen input mode (see below).
Recording a Dictation
- Select Dictation mode and tap the record button.
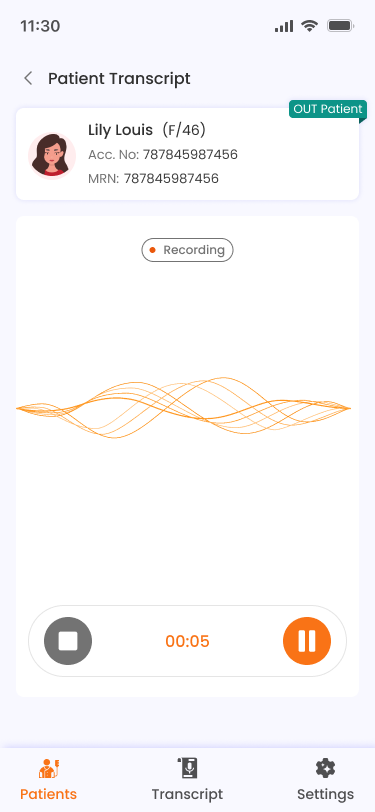
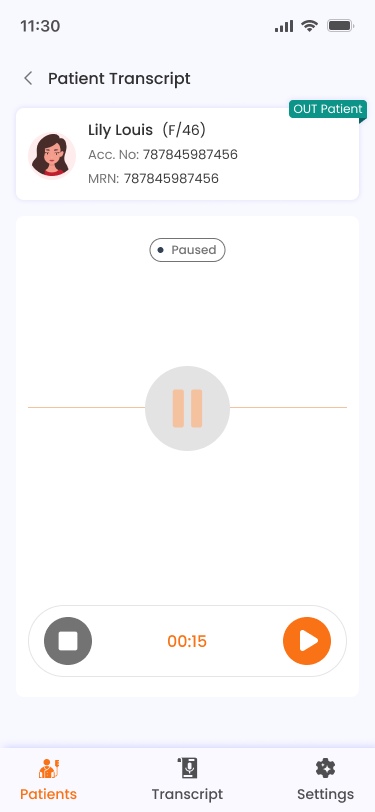
- The recording screen shows:
- Patient info at the top.
- A status badge (Recording or Paused).
- An animated waveform visualization.
- Controls: Stop (square icon), elapsed timer, and Pause/Play toggle.
- The screen stays awake during recording.
- Tap Stop to finish. The audio is automatically uploaded for transcription.
- You'll return to the notes list where the new note will appear.
Note
The app requires microphone permission. If permission is permanently denied, you'll be directed to your device's settings.
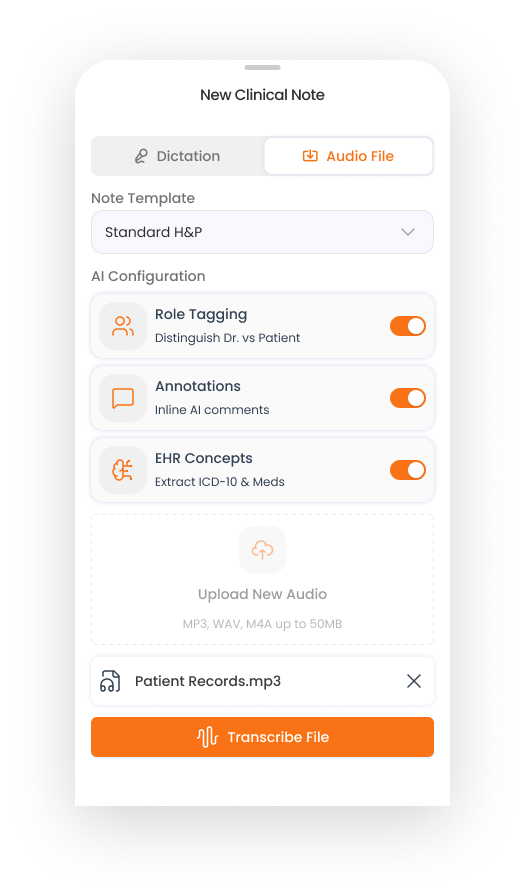
Uploading an Audio File
- Select Audio File mode.
- Tap the upload area to select an audio file (MP3, WAV, or M4A, up to 50 MB).
- The selected file name will be displayed.
- Tap Transcribe File to start processing.
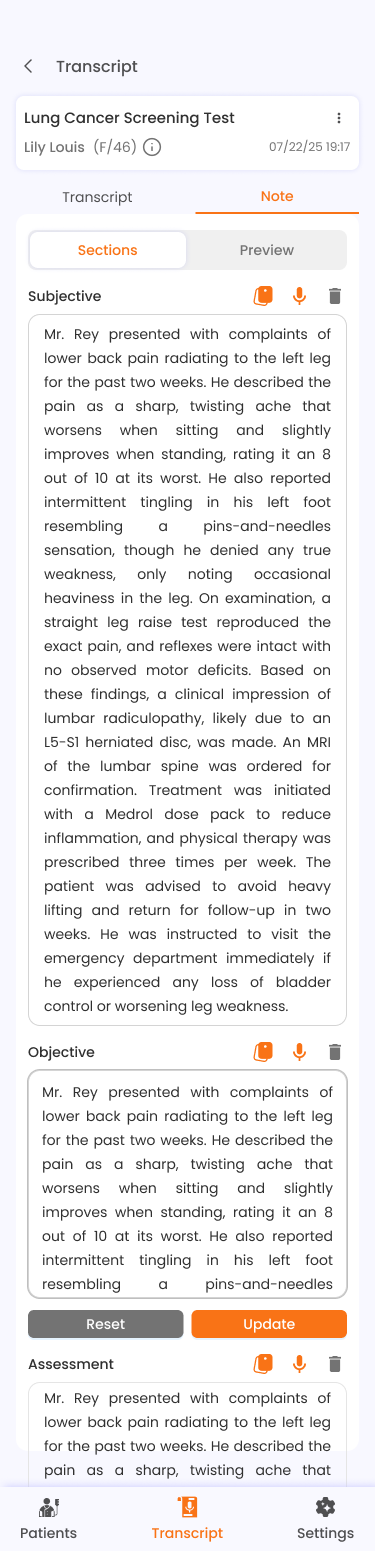
Viewing a Note
Tap any completed note to open the Note Detail screen. It contains:
- Header: Note name, patient info, timestamp, and an info icon (ⓘ) for full details.
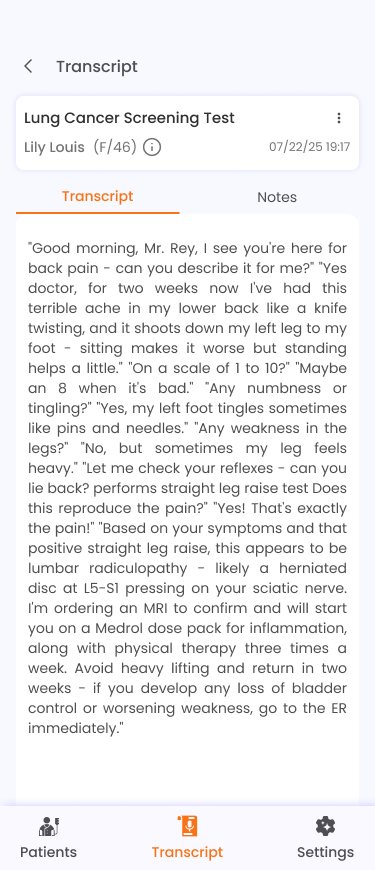
- Tabs:
- Transcript — the raw audio transcript.
- Role Tag — transcript with speaker labels (shown only if role tagging was enabled).
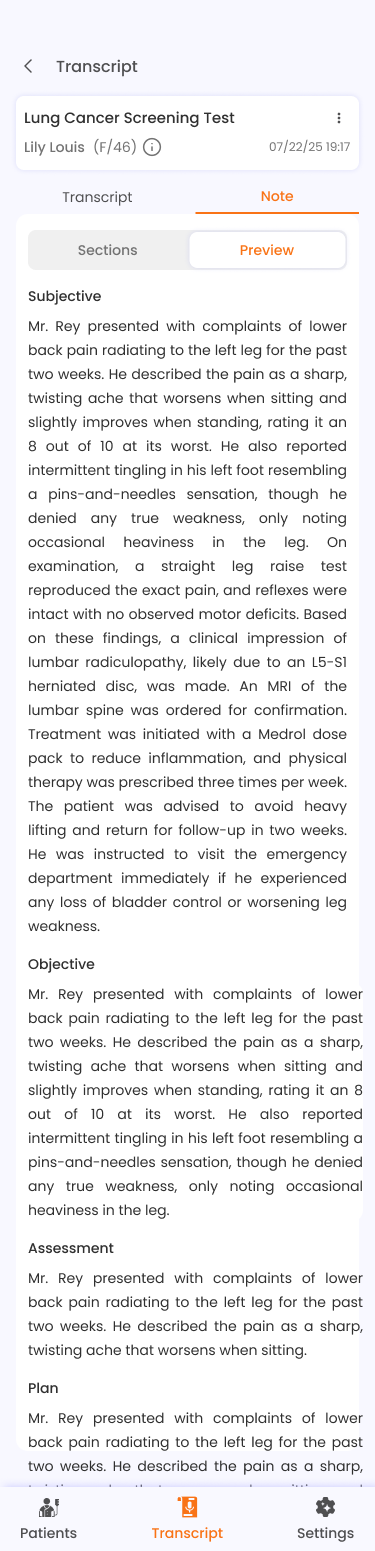
- Note — the AI-generated clinical note with structured sections.

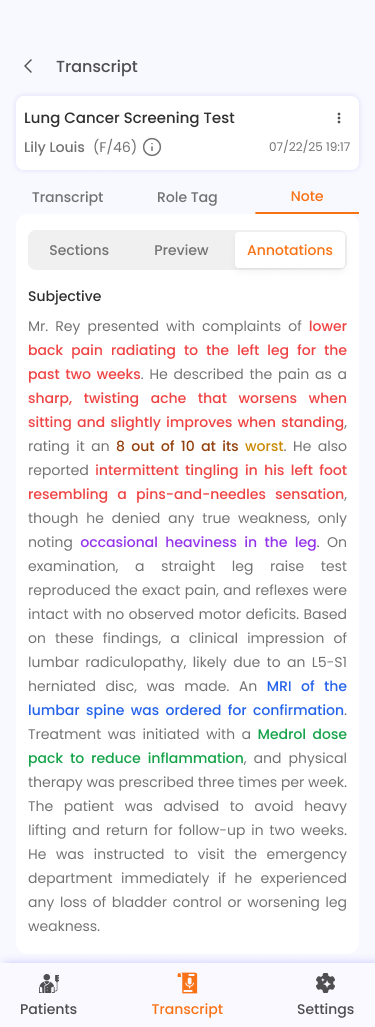

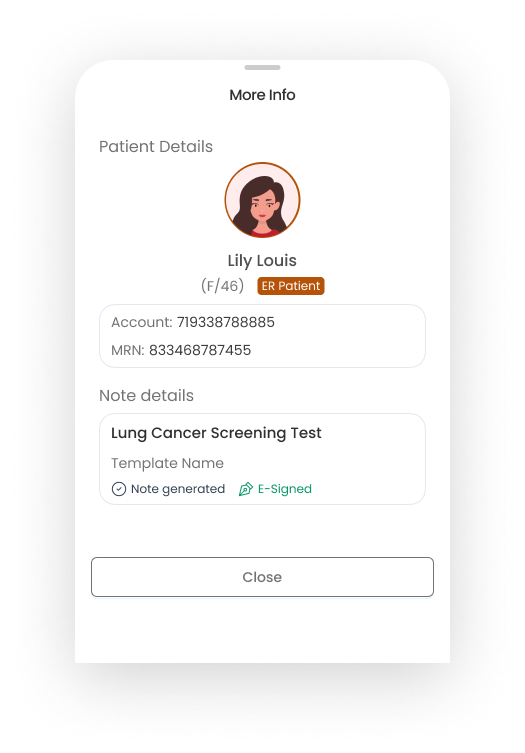
The info icon opens a More Info sheet with detailed patient and note metadata.
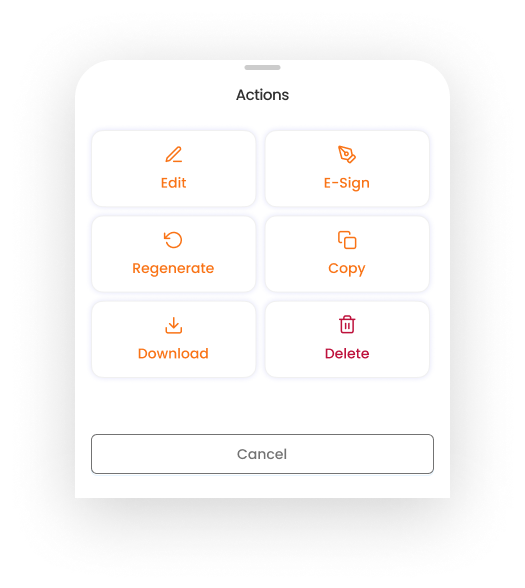
Note Actions
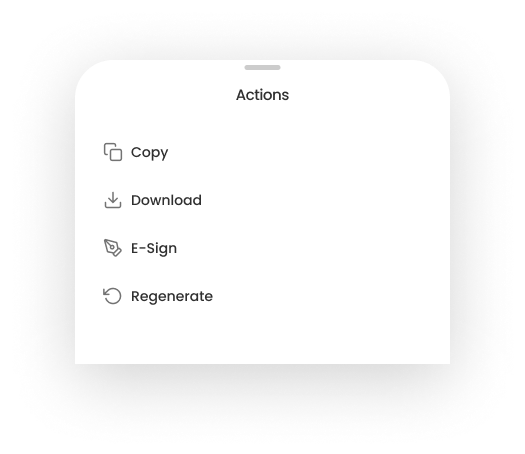
Tap the three-dot menu (...) on any note (from the notes list or note detail) to access:
| Action | Description | Availability |
|---|---|---|
| Edit | Rename the note | All modes |
| E-Sign | Apply your electronic signature | Standalone only (if not already signed) |
| Sync EHR | Push the note content to the EHR system | Falcon EHR only |
| Regenerate | Re-process the note with different settings | All modes |
| Copy | Duplicate the note | Standalone only |
| Download | Export as PDF | Standalone only |
| Delete | Remove the note permanently | All modes |
Regenerating a Note
- Select Regenerate from the note actions menu.
- A sheet appears allowing you to change:
- Note template
- Role tagging (on/off)
- Annotations (on/off)
- Tap Regenerate to re-process the note with the new settings.
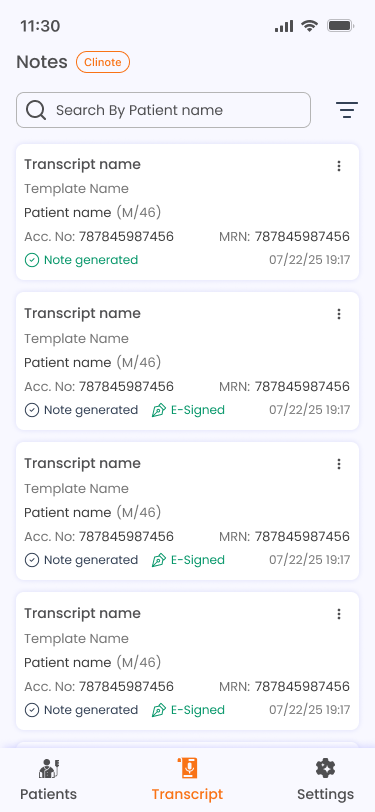
Transcript (All Notes)
The Transcript tab (second tab in the bottom navigation) shows all notes across all patients. It provides the same search, filter, and action capabilities as the per-patient notes list, but gives you a unified view of all your clinical notes.
Each note card displays: note name, template category, patient name, gender/age, account number, MRN, status, and date.
E-Sign
Electronic signatures are available in Standalone (Clinote) mode.
Setting Up Your E-Signature
- Go to Settings > E-Sign.
- If no signature exists, you'll see an Add E-Sign button.
- Tap it to open the signature drawing canvas.
- Draw your signature on the canvas.
- Save to store your e-signature.

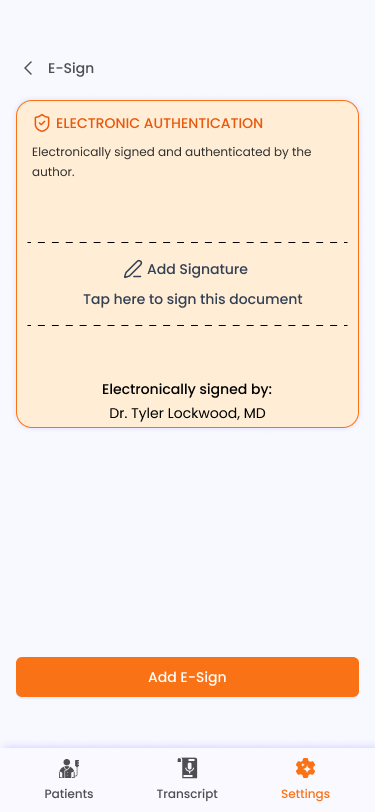
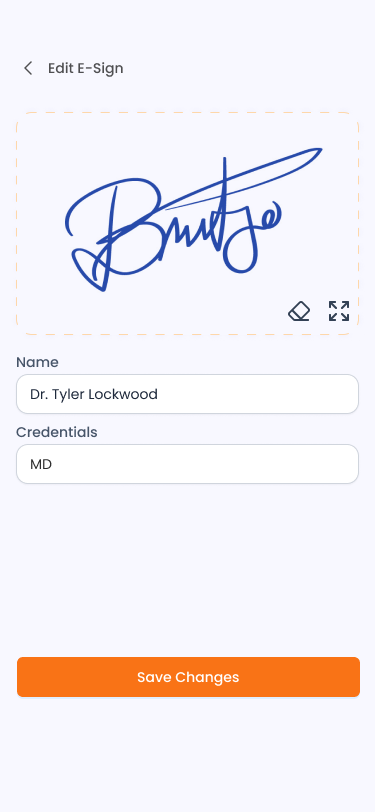
You can edit your existing signature at any time by tapping Edit E-Sign.
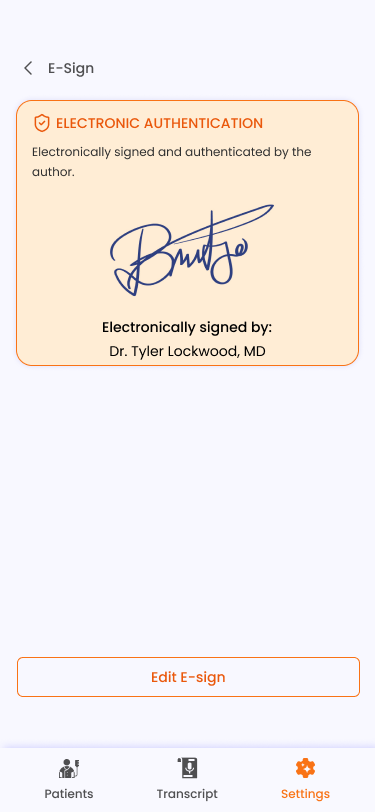

E-Signing a Note
- Open a note's actions menu and select E-Sign.
- If you haven't set up an e-signature yet, you'll see a message: "Please set up your e-signature first."
- Once signed, the note displays an E-Signed badge. This action is permanent and cannot be undone.
EHR Integration
EHR integration is used in Falcon EHR mode to connect with an external Falcon EHR system.
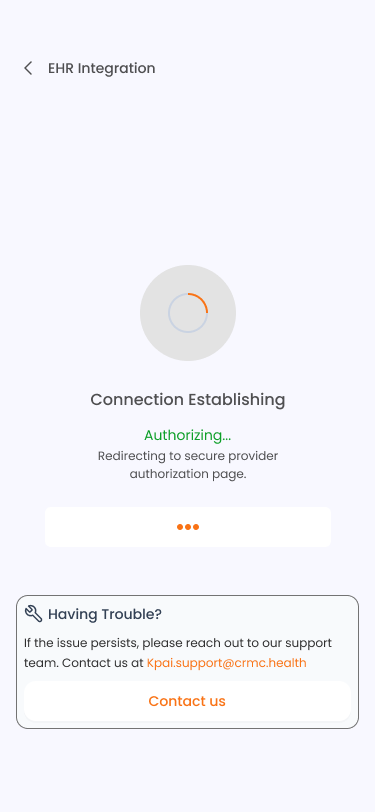
Connecting to EHR
- Go to Settings > EHR Integration (or tap Connect To EHR from the Patients screen).
- Tap Connect To EHR. This opens an OAuth authentication flow in your browser.
- Complete the authentication in the browser.
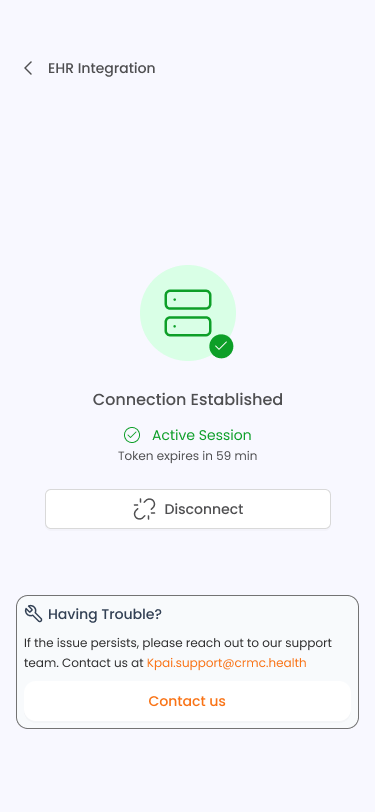
- The app will show a "Connection Establishing" spinner, then transition to a Connected state with a green checkmark.
Adding patients with EHR
In EHR mode, patients are managed through your connected EHR system rather than added manually in Clinote:
- Patients are registered in the EHR by the access services team based on patient type.
- Registered patients are assigned to physicians within the EHR.
- Physicians can also self-assign patients upon logging in to the EHR application.
Once assigned, these patients become available in Clinote for note creation and syncing.
Syncing a Note to EHR
- In Falcon EHR mode, open a note's actions menu and select Sync EHR.
- The note content is sent to the connected EHR system.
- On success, a confirmation message appears and the note shows an EHR synced indicator.
Note
The patient must have a valid EHR patient ID and visit ID for sync to work.
Disconnecting from EHR
- Go to Settings > EHR Integration.
- Tap Disconnect.
- Confirm in the dialog. Your EHR connection will be removed.
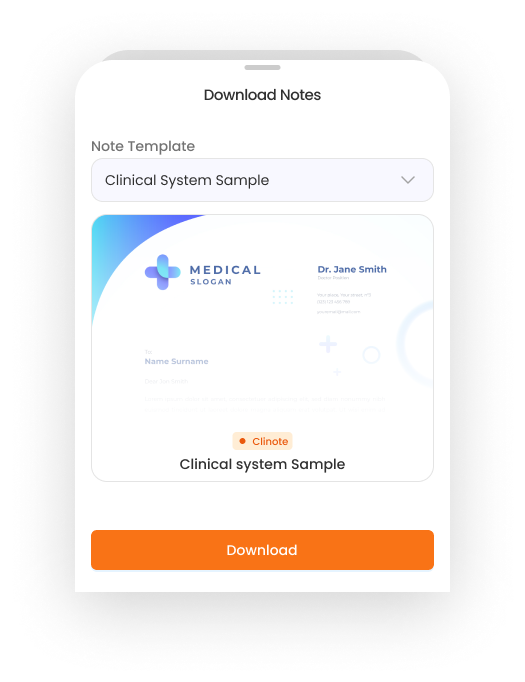
PDF Export
PDF export is available in Standalone (Clinote) mode.
- Open a completed note's actions menu and select Download.
- The Download Notes sheet appears with a grid of available letterheads (System Default + any custom letterheads you've uploaded).
- Select a letterhead.
- Tap Download.
- A system save dialog appears where you can choose the file name and save location.
Note Templates
Templates define the structure and sections of your clinical notes. Access them from Settings > Note Templates.
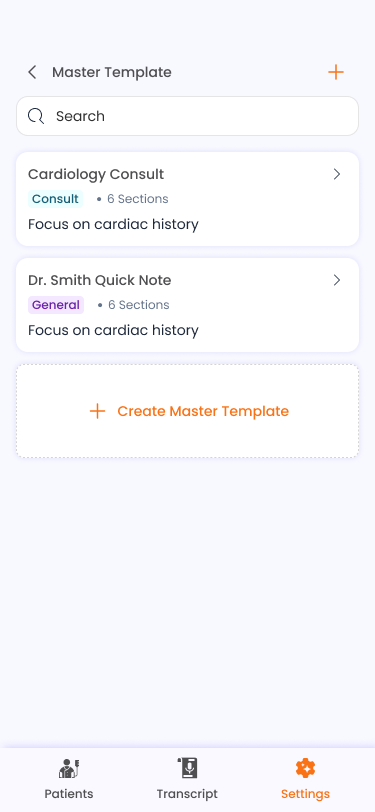
Predefined Templates
These are master templates created by administrators. They are read-only and available to all users.
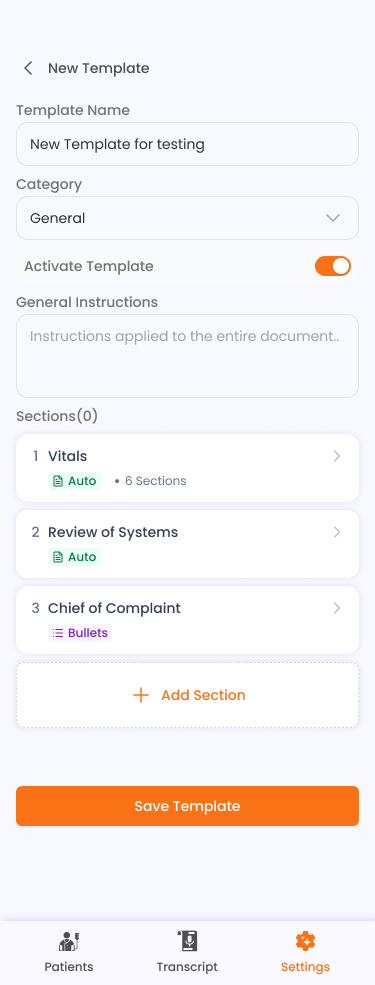
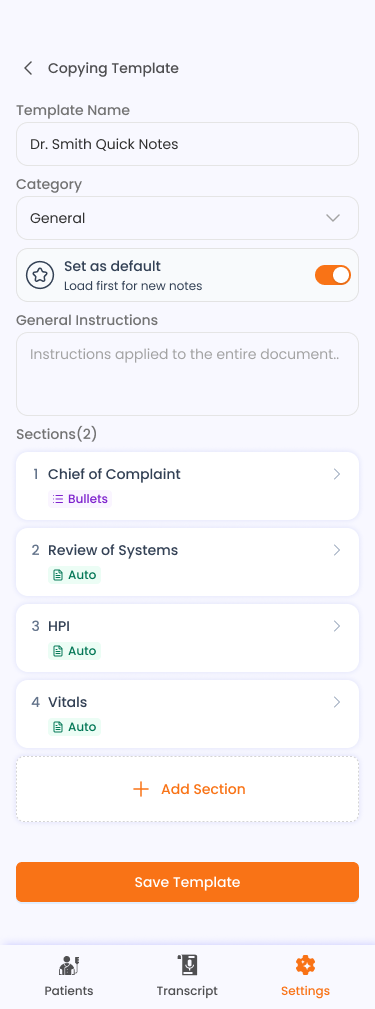
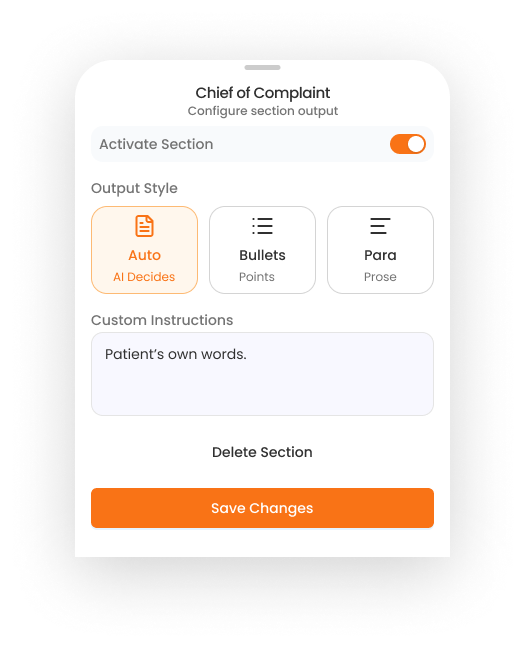
Custom Templates
You can create your own templates:
- Go to Settings > Note Templates and switch to the Custom tab.
- Tap Create Template or the + icon.
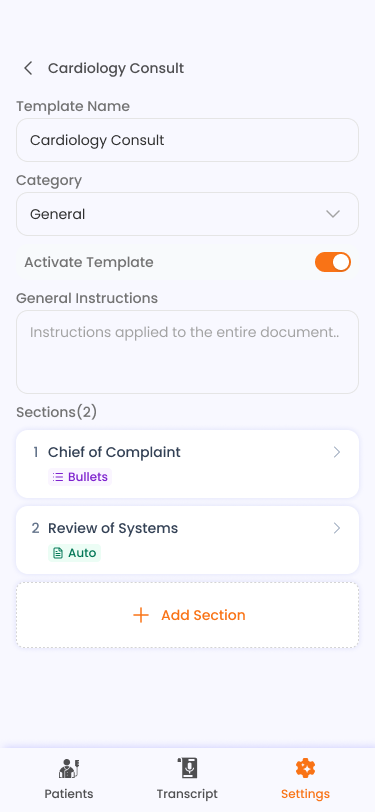
- Choose:
- From Scratch — start with a blank template.
- Copy — duplicate an existing template and customize it.
- Fill in the template name and configure the sections.
- Save your template. It will appear in the template dropdown when creating notes.
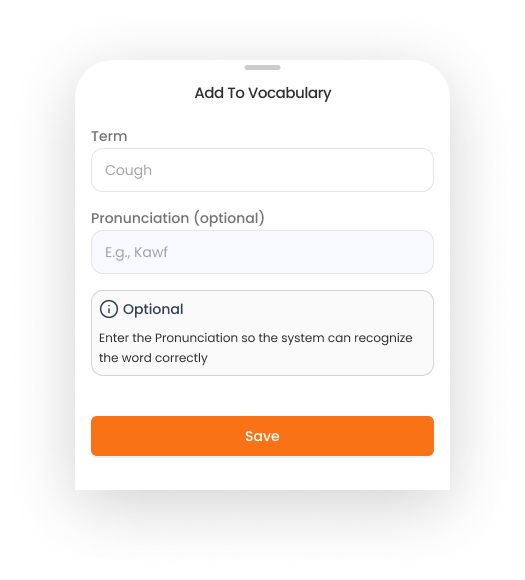
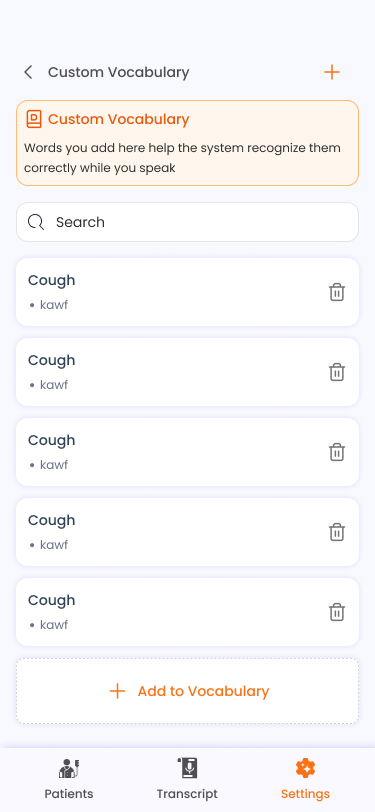
Custom Vocabulary
Custom vocabulary helps the AI speech recognition system correctly identify specialized medical terms, proper nouns, or uncommon words.
- Go to Settings > Custom Vocabulary.
- Tap Add to Vocabulary or the + icon in the header.
- Enter the word. The system may auto-suggest related terms.
- Set or verify the pronunciation.
- Save. The word will be used to improve transcription accuracy.
You can search, view, and delete vocabulary entries from this screen.
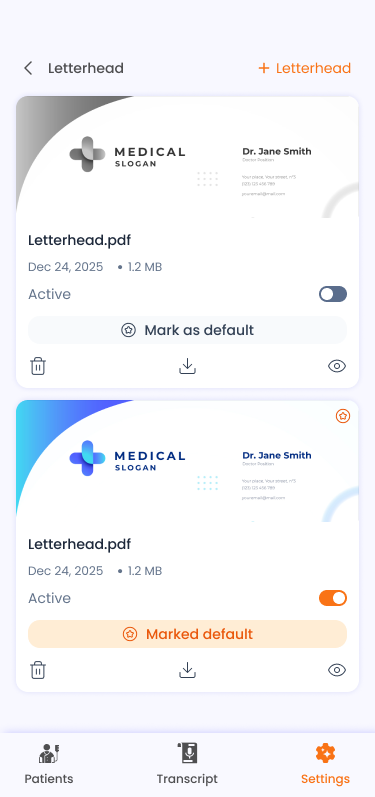
Letterhead Management
Letterheads are used as headers on exported PDF notes.
- Go to Settings > Letterhead.
- Your existing letterheads are listed with thumbnail previews.
- For each letterhead you can:
- Toggle Active/Inactive — control whether it appears in the PDF download sheet.
- Mark as Default — set as the default letterhead for PDF exports.
- Preview — open a full-screen PDF preview.
- Download — save the letterhead PDF to your device.
-
Delete — remove the letterhead permanently (with confirmation).
-
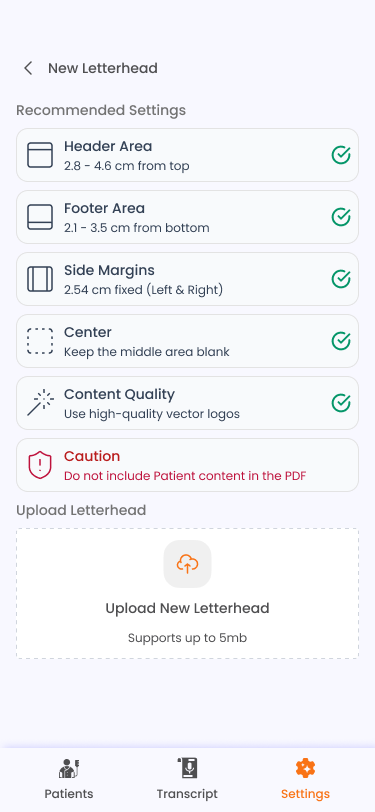
Tap Add Letterhead in the header to upload or create a new letterhead.

Note
In Falcon EHR mode, letterhead management requires an active EHR connection.
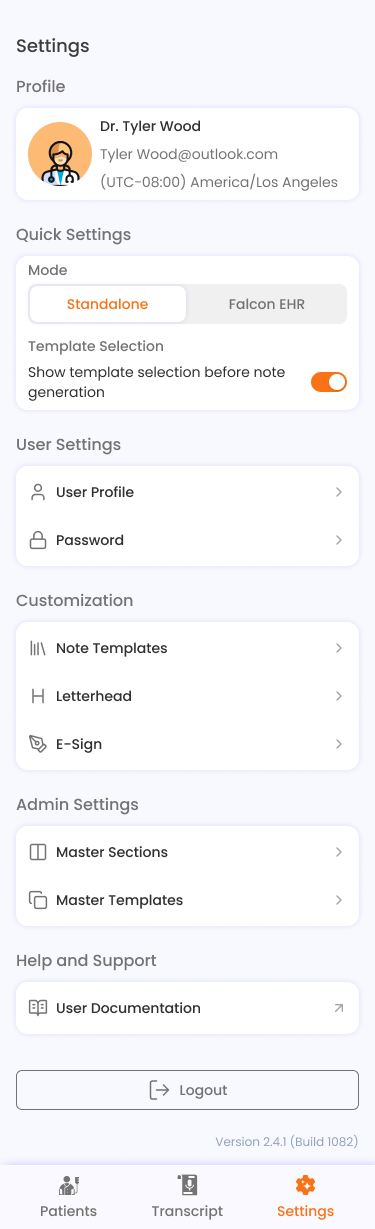
Settings
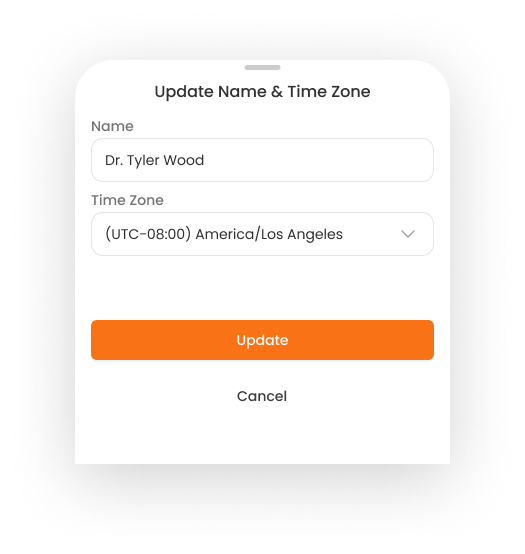
Profile
Go to Settings > Profile to manage your account:
- Update Name & Timezone: Tap the update button to edit your display name and timezone.
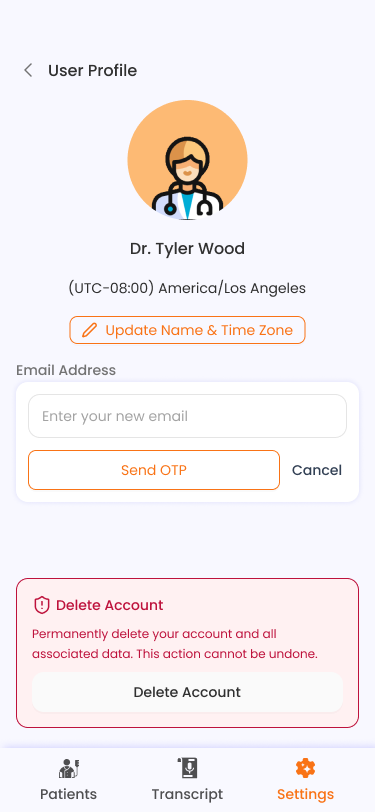
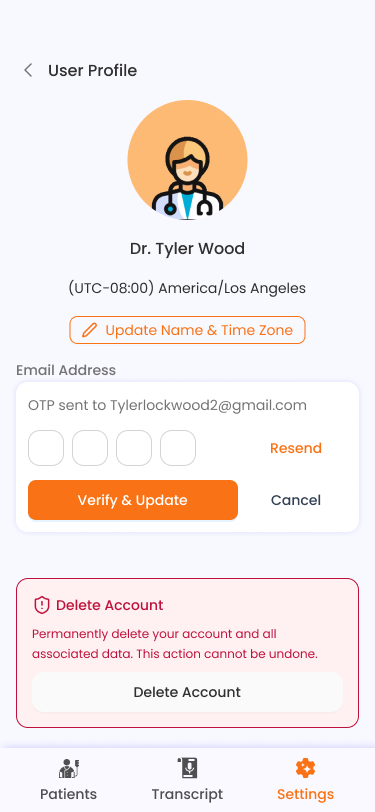
- Change Email: Enter a new email address. A verification OTP will be sent to confirm the change.
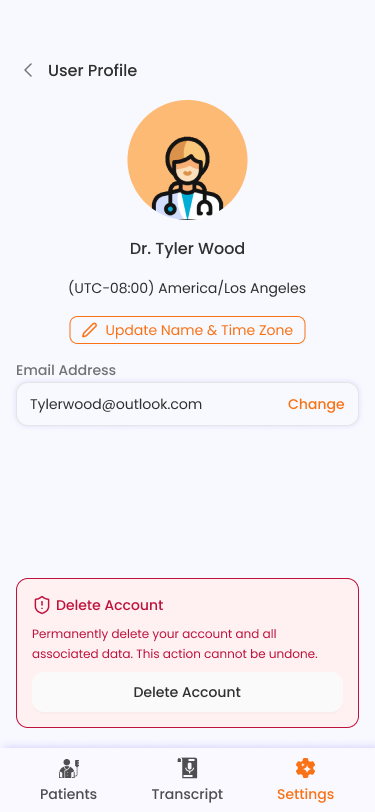
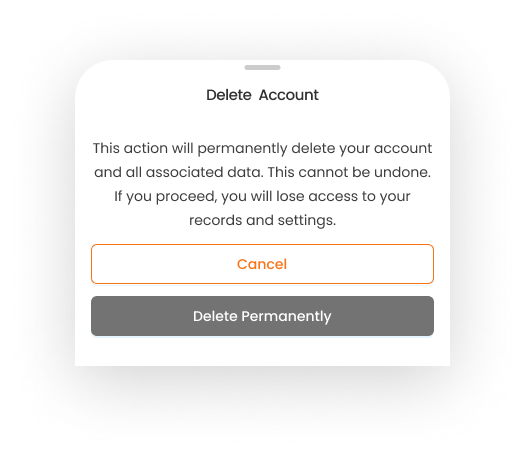
- Delete Account: A permanent action. You will be asked to confirm before your account is removed.
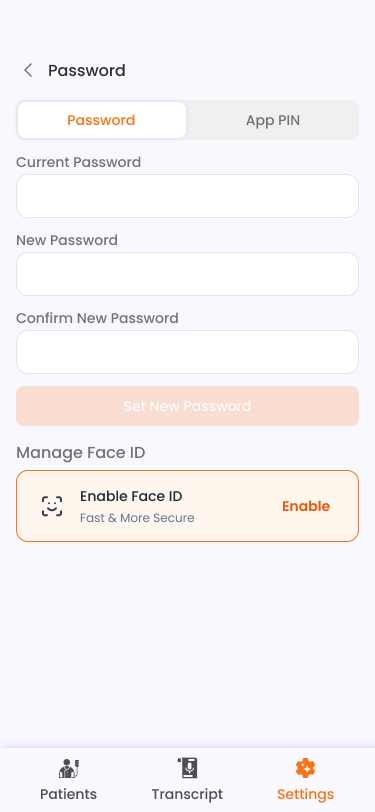
Password & App PIN
Go to Settings > Password to manage your credentials:
Password Tab: - Enter your current password, then your new password and confirmation. - Tap Set New Password to save. - Below the password section, you can enable or disable biometric authentication (Face ID / Fingerprint).
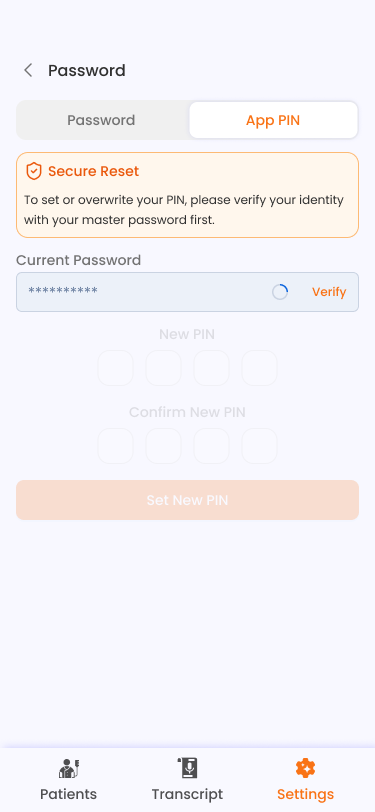
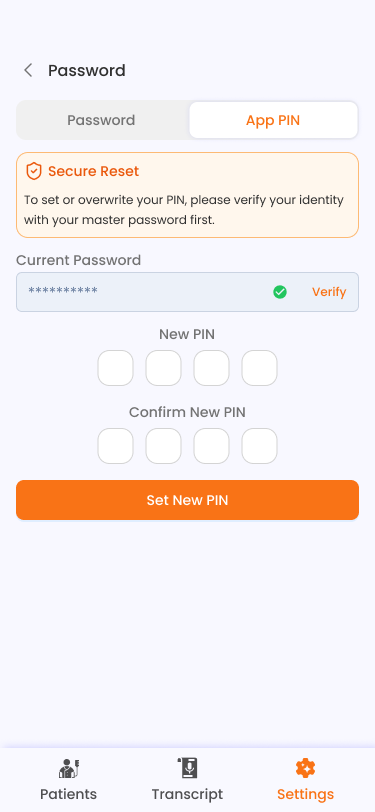
App PIN Tab: - First verify your current PIN by entering it and tapping Verify. - Once verified, enter and confirm your new 4-digit PIN. - Tap Set New PIN to save.
Template Selection Toggle
In Quick Settings, the Template Selection toggle controls whether the template dropdown appears in the note creation sheet. When disabled, notes are created with the default template automatically.
Admin Settings
Available only for administrator accounts:
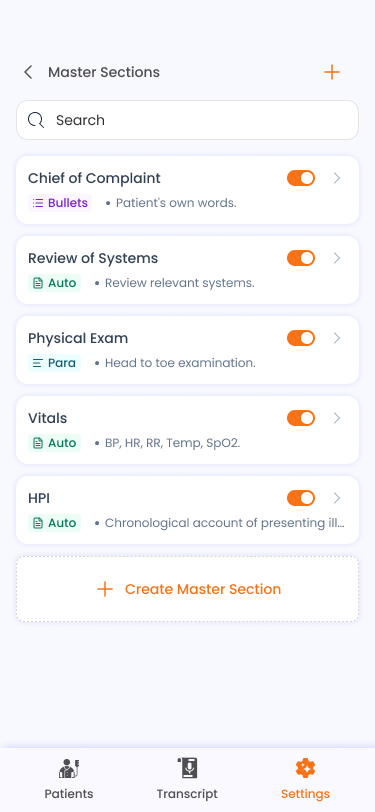
- Master Sections: Manage the section types available in note templates.
- Master Templates: Create and manage templates that are available to all users as predefined templates.
Troubleshooting & FAQ
Q: I forgot my PIN. What do I do? A: On the PIN entry screen, tap Forgot PIN?. This will log you out and redirect you to the login screen. After logging in again, you can set up a new PIN.
Q: The app keeps asking for my PIN. A: The app requires PIN verification each time it is opened or resumed from the background. This is a security feature to protect patient data.
Q: My audio recording fails to upload. A: Check your internet connection and try again. Ensure the audio file is under the 50 MB size limit. Supported formats are MP3, WAV, and M4A.
Q: I can't see the E-Sign or Download options. A: These features are only available in Standalone (Clinote) mode. Switch your app mode in Settings > Quick Settings.
Q: I can't see the Sync EHR option. A: This feature is only available in Falcon EHR mode and requires an active EHR connection. Check your mode and connection status in Settings.
Q: My note is stuck in processing. A: Note transcription depends on the server. If a note remains in a processing state for an extended period, try pulling down to refresh the notes list.
Q: How do I switch between Standalone and Falcon EHR modes? A: Go to Settings > Quick Settings and tap the mode toggle to switch between Standalone and Falcon EHR.
Q: Microphone permission was denied. How do I fix it? A: The app will prompt you to open your device's system settings. Navigate to the app's permissions and enable microphone access.
Falcon CliNote — AI-Powered Clinical Documentation